This post contains affiliate links, please read our disclosure policy.
How to make a signs perfect for Thanksgiving using your Cricut and a wooden mason jar cut out.
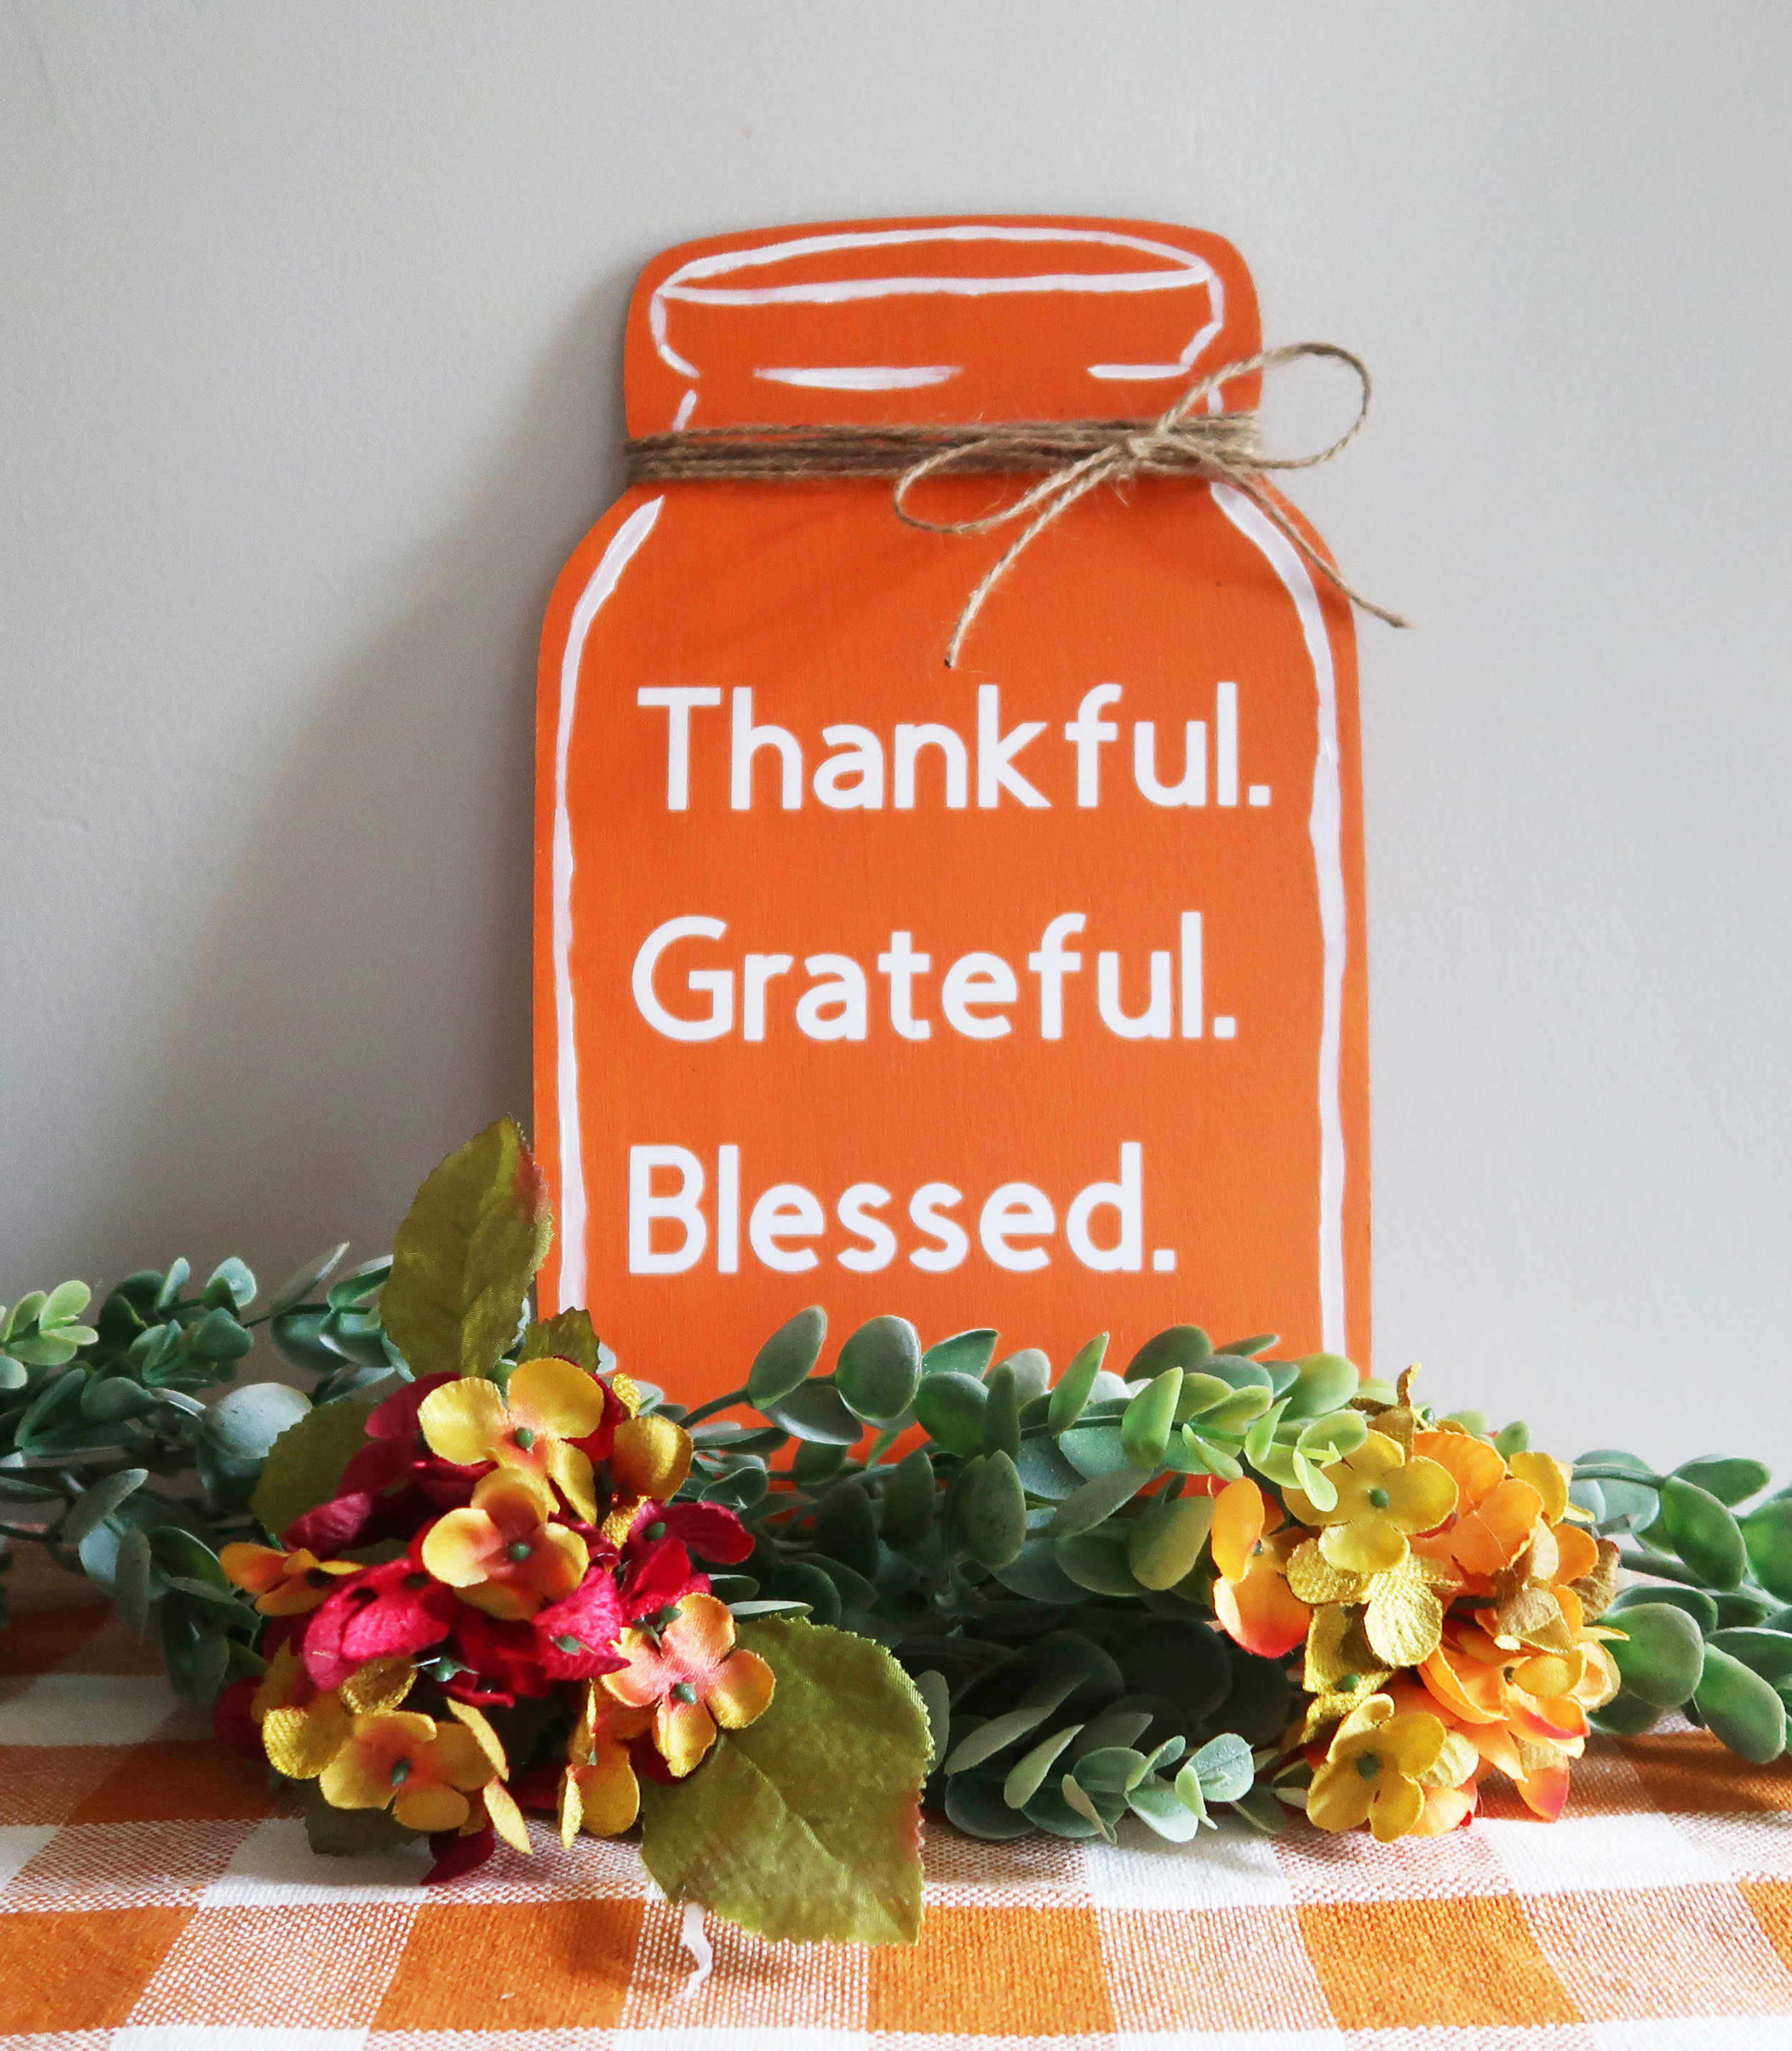
Decorating for Thanksgiving is always fun because it perfectly integrates into Fall decor. Now I usually skip over decorating for Halloween and just decorate for Fall. This fall I have made an embroidery hoop wreath, buffalo check mason jar, buffalo check pumpkin and a pumpkin patch sign. Today I thought I would make a Thanksgiving mason jar sign with my Cricut Explore Air 2.
Today myself and 5 other bloggers are all crafting for thanksgiving using mason jars, well kinda. I may have cheated and I am using a the shape of a mason jar but that still counts right?! Stick to the end of this post to see what projects they created.
So let’s make a Thanksgiving mason jar sign.
This post may contain affiliate links
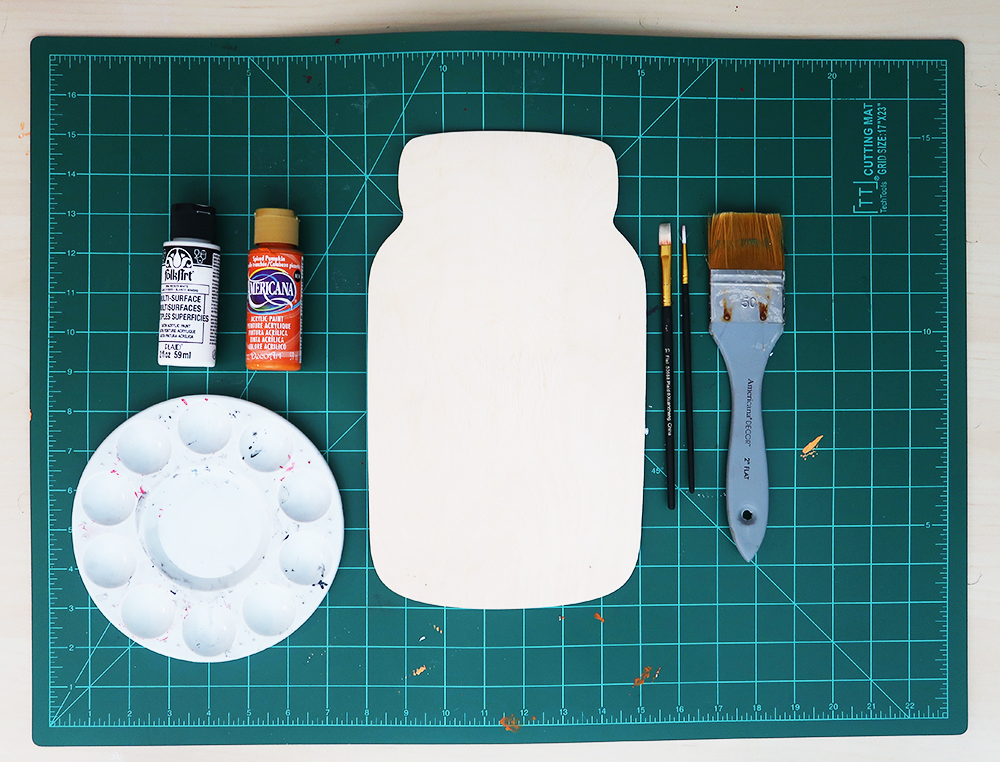
Here’s what you’ll need
-
Vinyl
-
Scrapper
-
Paint Brushes
-
Twine
-
Acrylic Paint
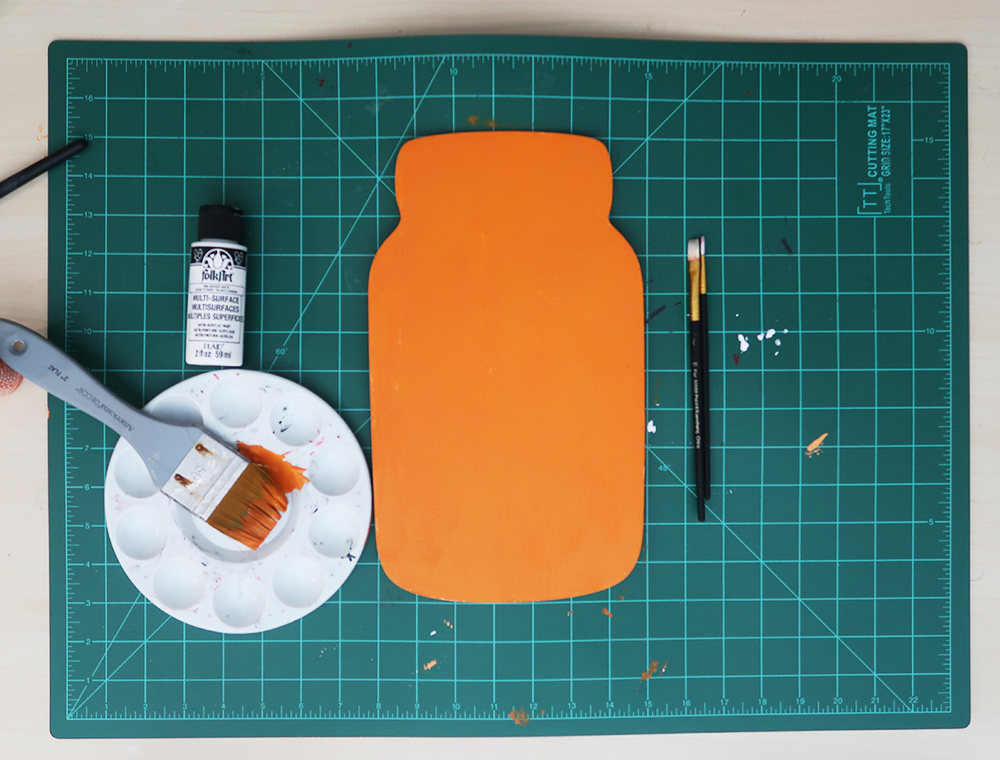
Step 1: Paint
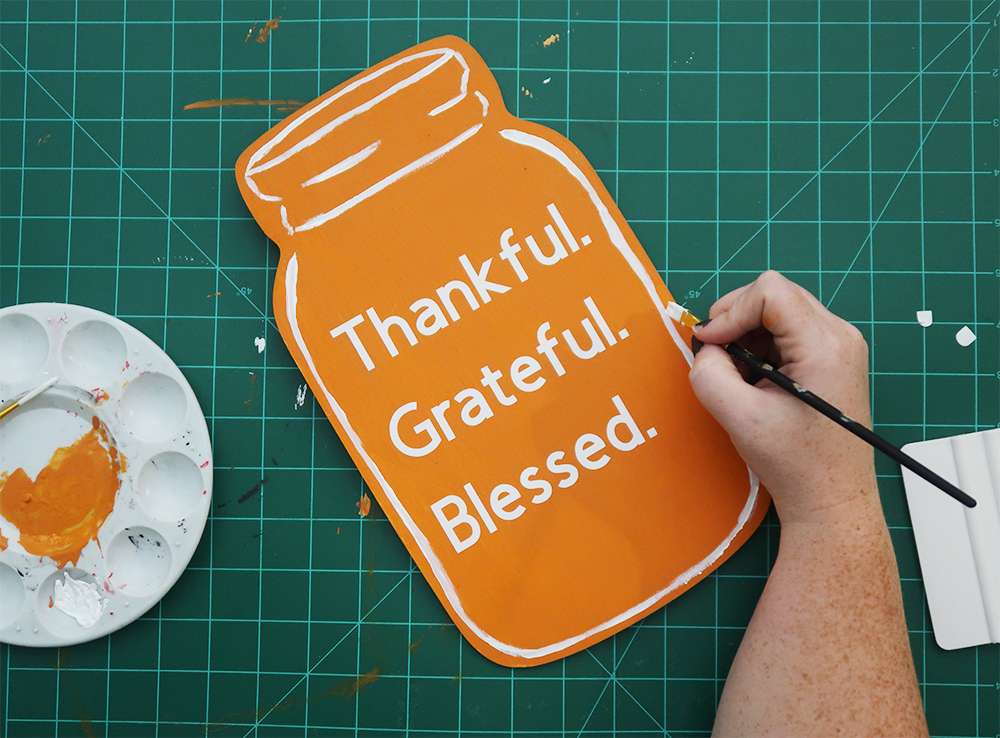
Start by choosing a base color for your sign. I decided to use a pumpkin spice orange not only did it match my other fall decor it also felt very appropriate for Thanksgiving. I gave the mason jar cut out one coat let it dry then touched up where needed.
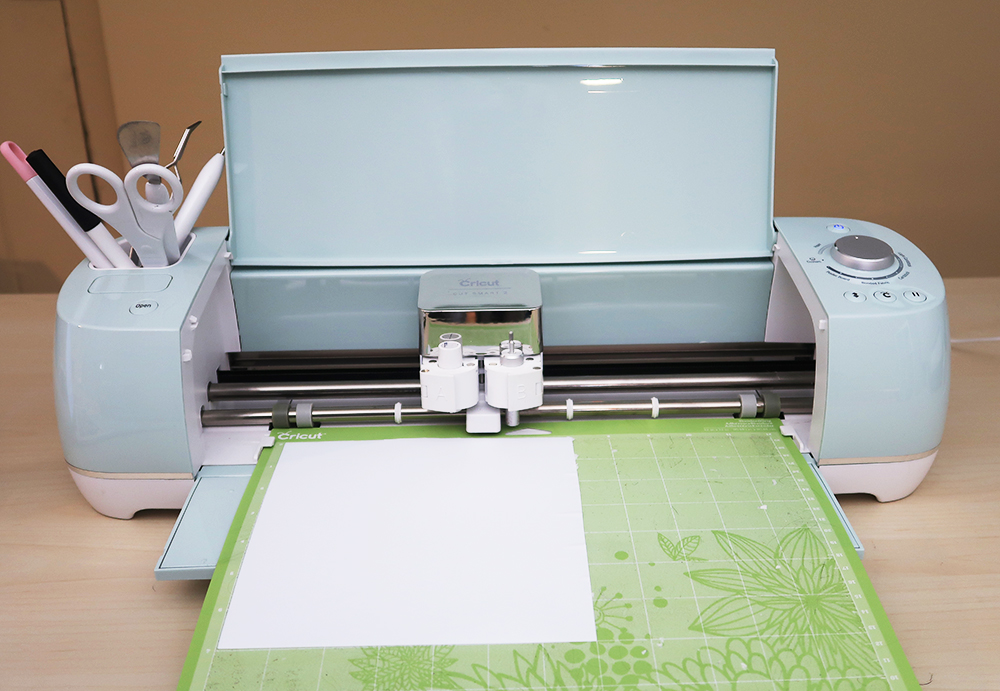
Step 2: Design & Cut
In Cricut design space create a saying or design to cut. Using permanent vinyl load your machine, make sure to turn the dial to vinyl. In design space click make it and follow the instructions.
Step 3: Weeding
Once your design is cut you will need to weed out any of the excess vinyl. Now there are two ways you could make this sign. You could use the vinyl lettering as your letters by transferring them. Or if you wanted more of a painted look you could use the vinyl as a stencil. Today we are going to use the vinyl lettering.
Step 4: Transfer
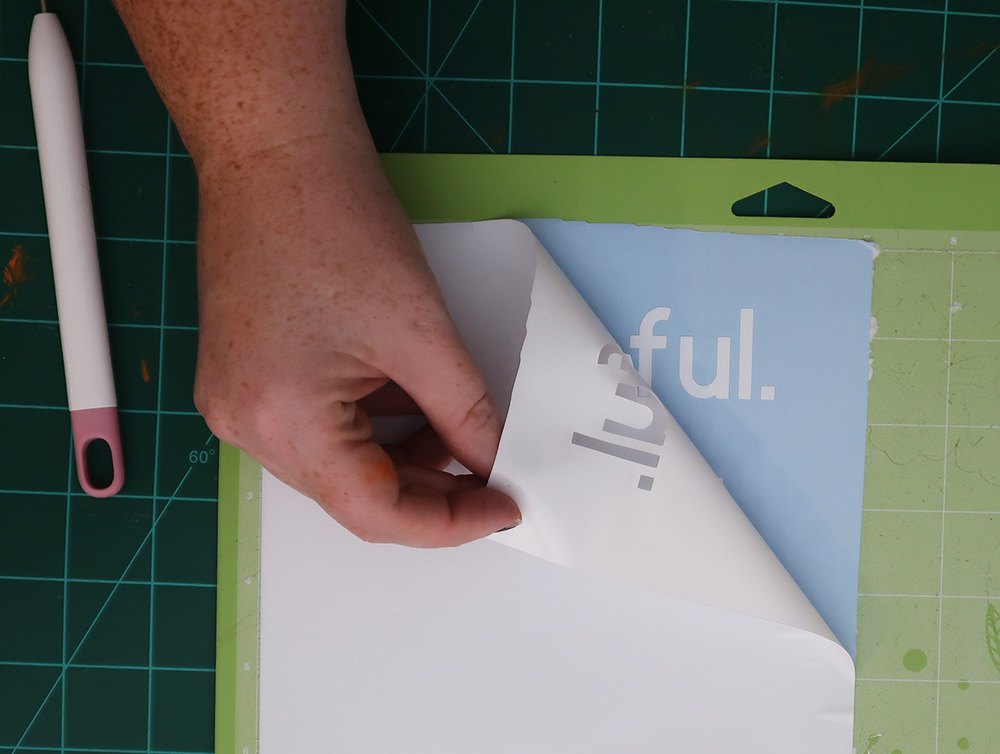
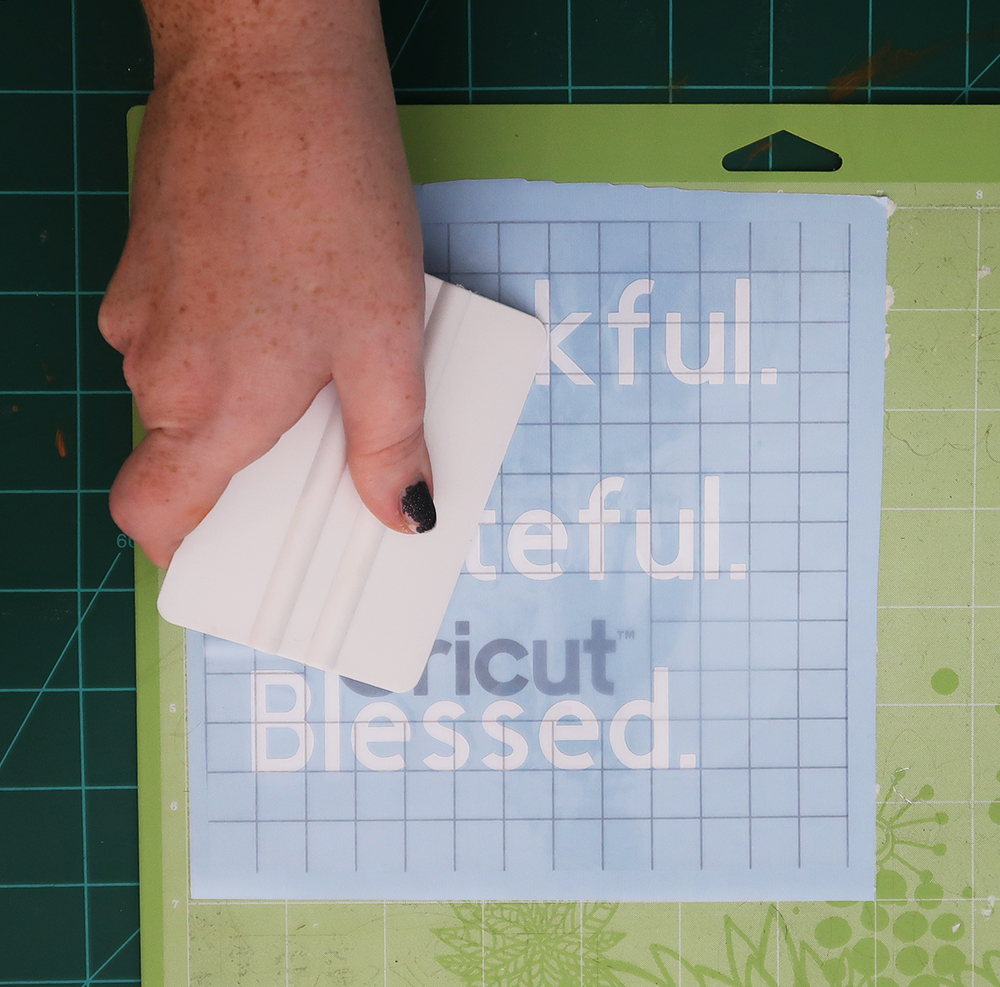
Once your design is weeded use transfer tape to transfer your design to the wooden cut out. Place the transfer tape over your vinyl and use a scrapper to help adhere it to the transfer tape. Peel back low and slow and you are ready to transfer your lettering to the mason jar cut out.
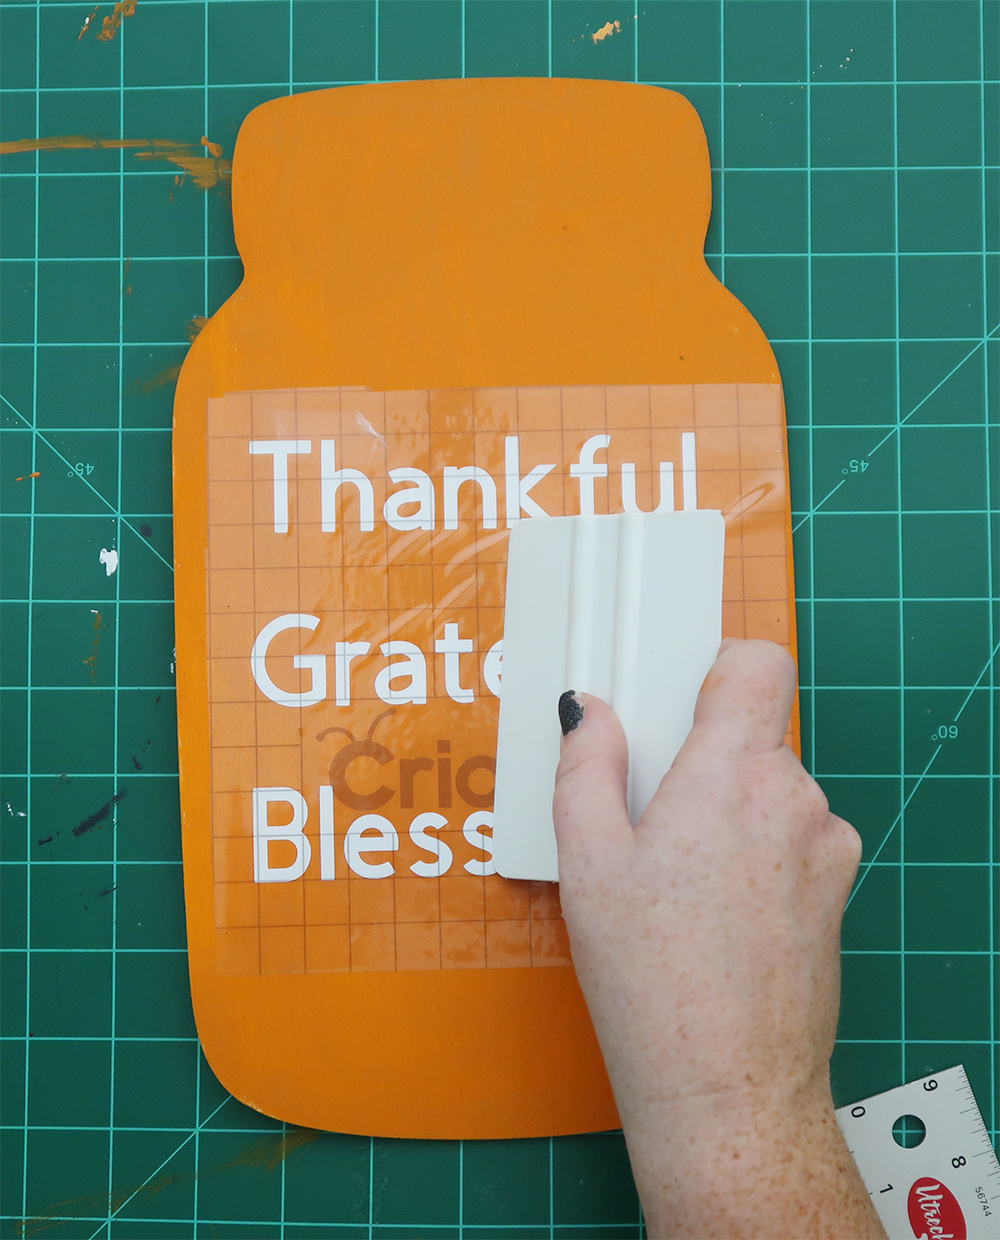
I like to use transfer tape with grid lines. This makes it easier to place it straight on your sign. Once you have it placed use your scraper again and run it over the vinyl a few times. Pull back the transfer tape low and slow. If letters start to come up with the transfer tape then use the scraper to go over that section again.
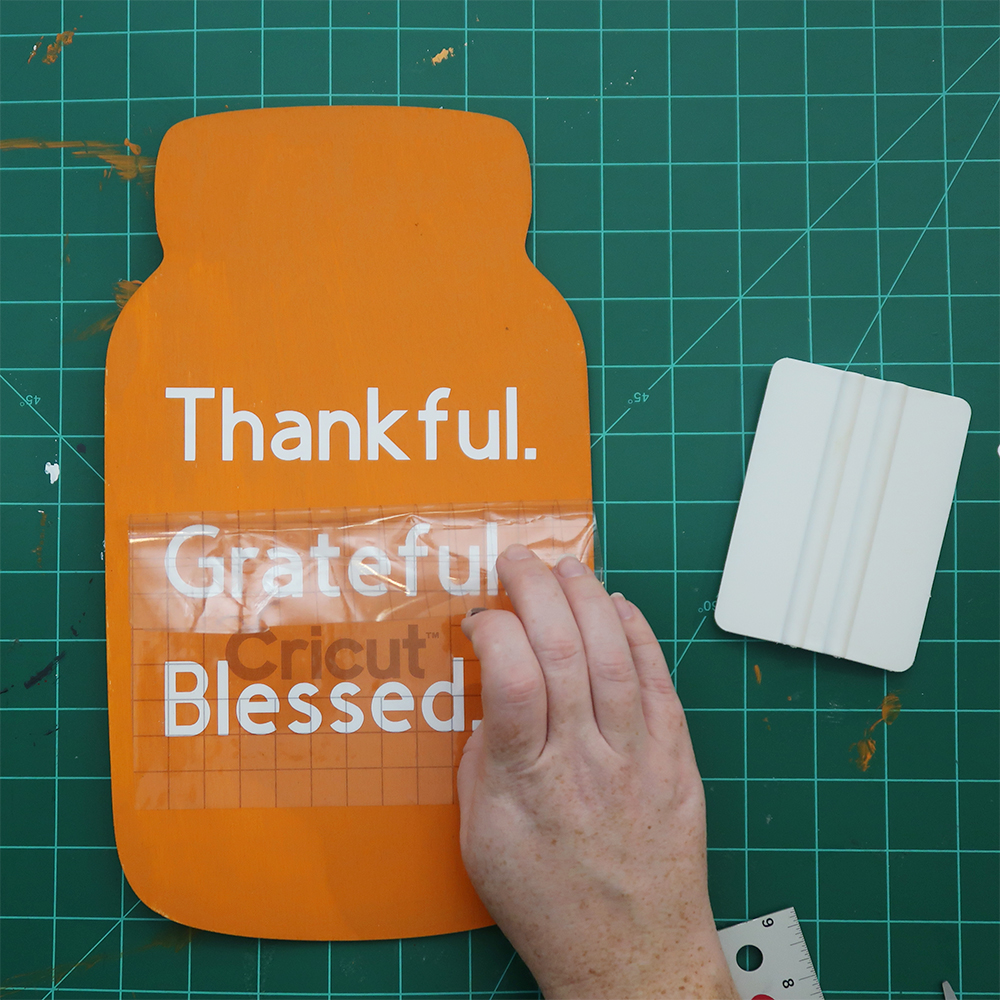
Step 5: Paint Details
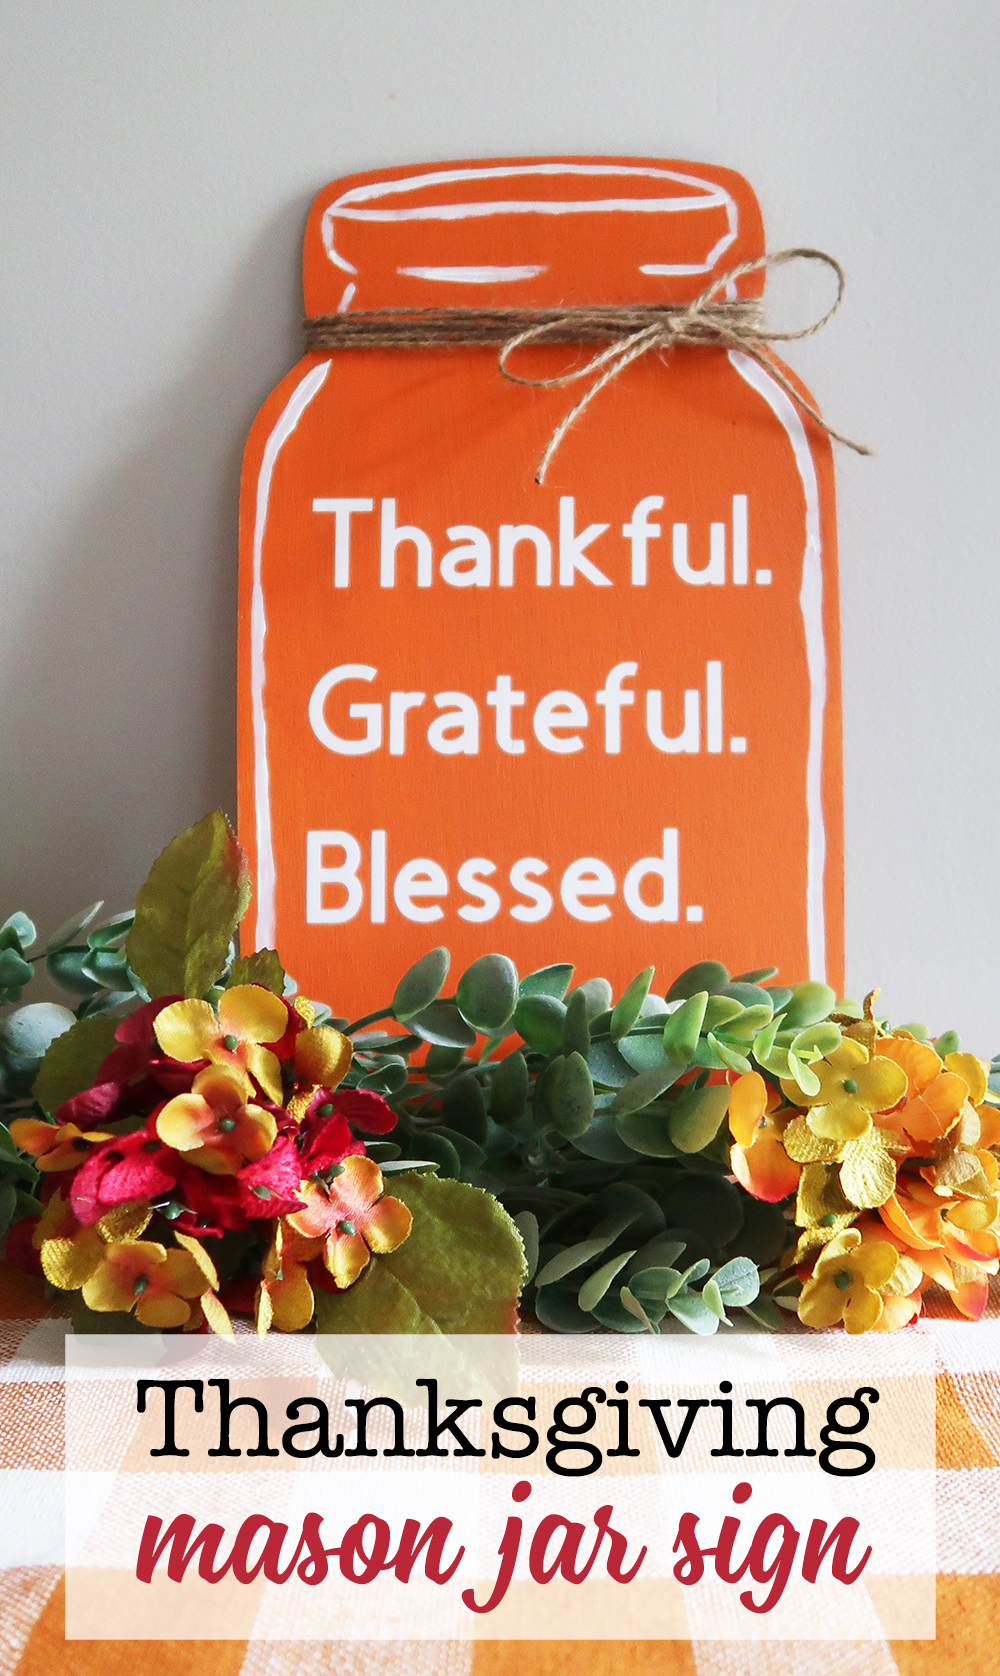
Now it was looking cute but I was missing the fact that it was a mason jar. I decided to paint the outer edges and the rim just like a mason jar. I used white to go with the lettering and I think this detail really makes the mason jar stand out.
Step 6: Finishing Touch
To complete the sign I decided to add a 3 dimensional element that would also be a texture. I used a long piece of twine and wrapped it around the neck of the bottle. Then tying it into a bow off to the side.
Like this project? Well there are 5 more Thanksgiving mason jar crafts to check out below!
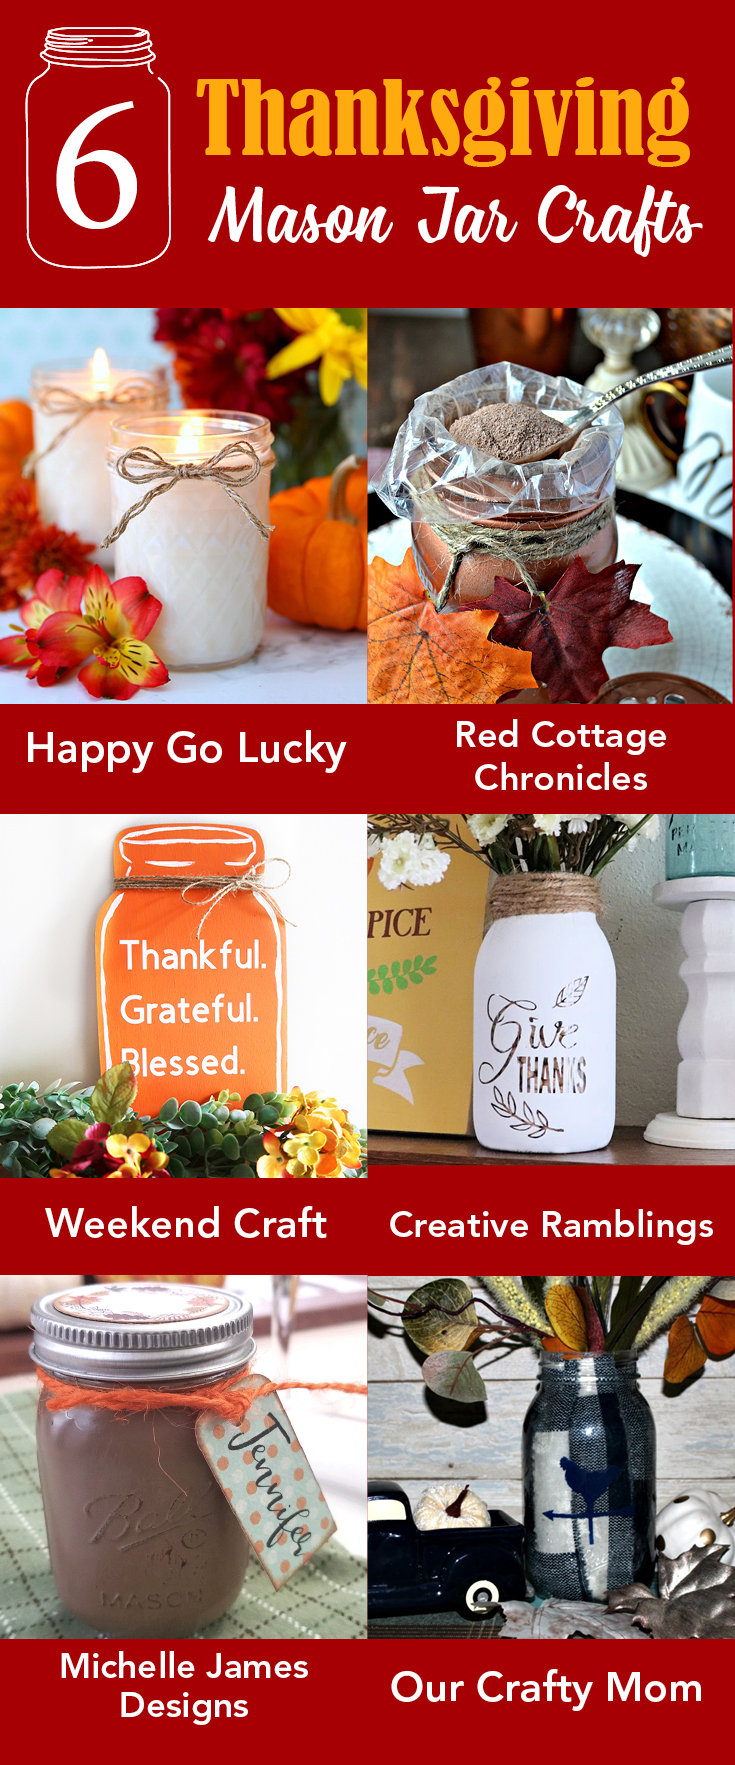
Thanksgiving Hostess Gift from Happy Go Lucky • Ball Jar Thanksgiving Favour from Red Cottage Chronicles • Thanksgiving Mason Jar Sign from Weekend Craft • Give Thanks Fall Mason Jar from Creative Ramblings • Mini Mason Jar Party Favors from Michelle James Designs • Make A Buffalo Check Mason Jar With Fabric from Our Crafty Mom


This is awesome. It looks bigger than I originally thought which is great because it is perfect for hanging up. I love the short video too. Nice job!
I like thinking outside the "jar" here, your wood cut out looks great.
Great job! I love it.