This post contains affiliate links, please read our disclosure policy.
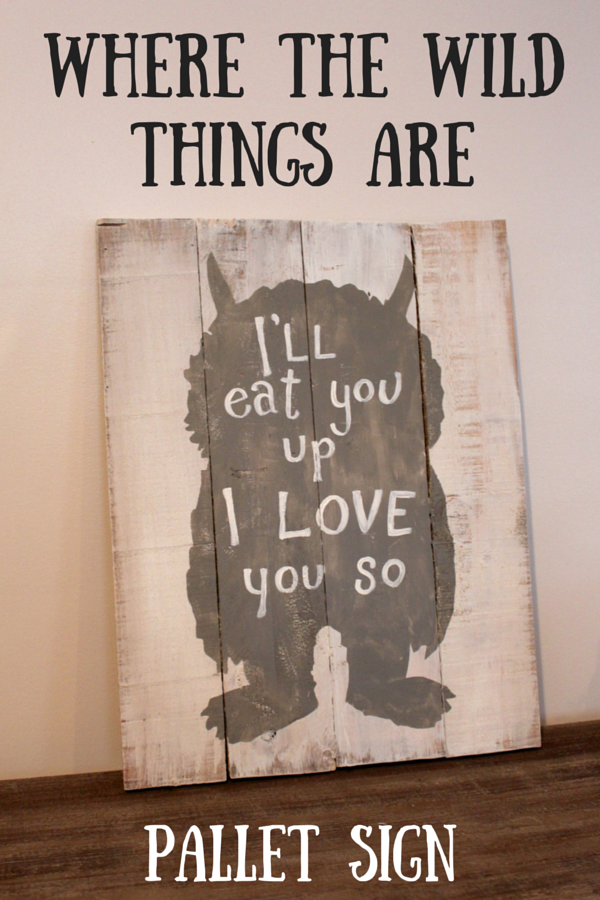
I have the best news in the world! One of my close friends is having triplets! YES TRIPLETS! Talk about instant family and I am so excited for her. So when she asked me to help her make a pallet sign for the nursery how could I refuse? And this happened at the perfect time because the Silhouette Challenge Theme this month is Word Art, how perfect. Make sure you stick around the end for 22 additional work art projects.
She came to me with a picture from Pinterest of a Where the Wild Things Are sign, this is the theme for the nursery. How cute. Now I don’t usually post ideas that aren’t completely mine but there are just so many of these signs out there I’m not sure who to credit first. So here is one of the pins she showed me.
What you will need
- Pallet Boards (Learn how to dismantle a pallet here)
- Paint (2 colors)
- Paint Brushes (large and detail brushes for lettering)
- Monster Stencil (Made from my Silhouette Cameo).
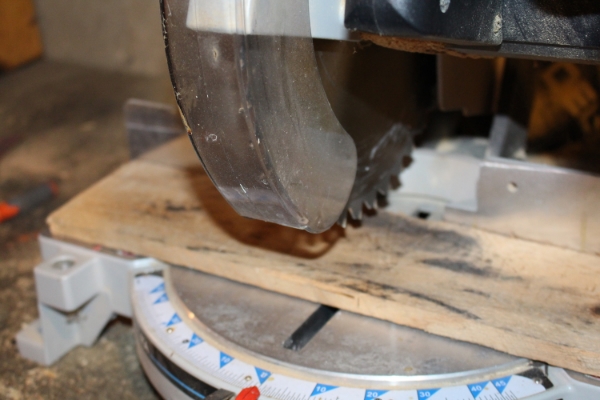
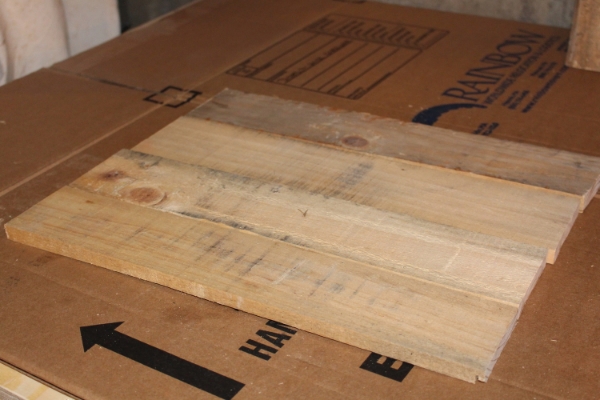
Cut four pieces of the pallet to equal lengths. I made this sign roughly 14 x 18.
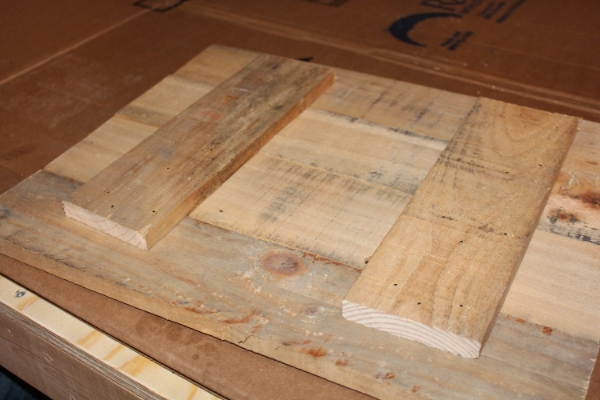
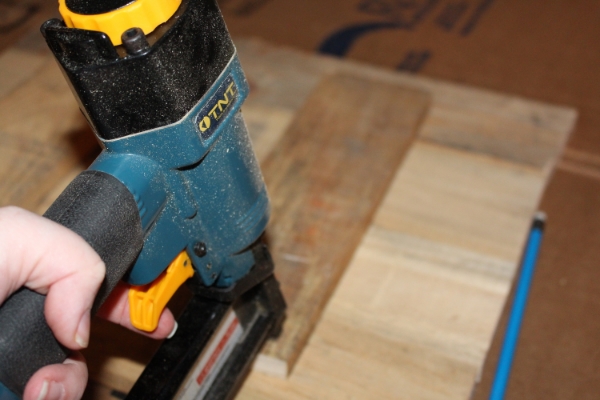
Cut two more pieces of the pallet to secure the back of the sign the backing should overlap all four pieces. Using a nail gun choose nails that are about 3/4 the thickness of the sign and the backing. Nail each at varying angles this will help keep the board secure. If you nail all in straight it would be easy to pull to backing from the sign.
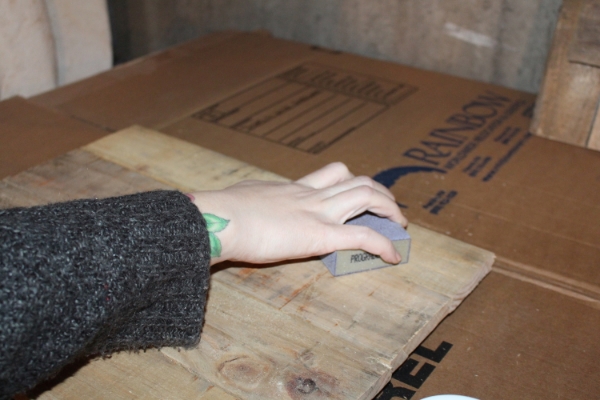
Normally I keep the signs rough but since this if for a nursery we decided to lightly hand sand the front of the sign.
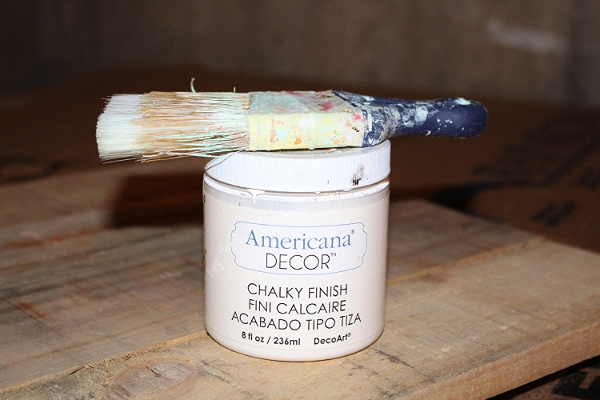
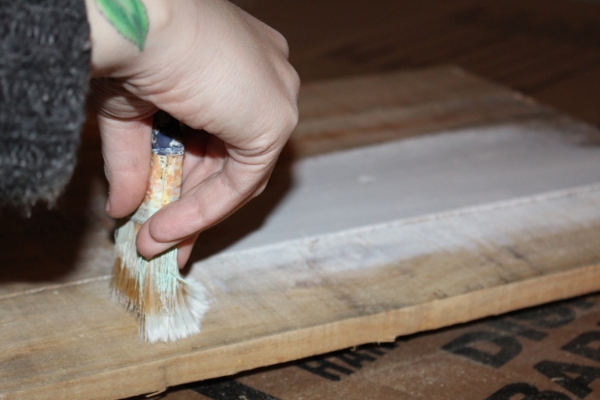
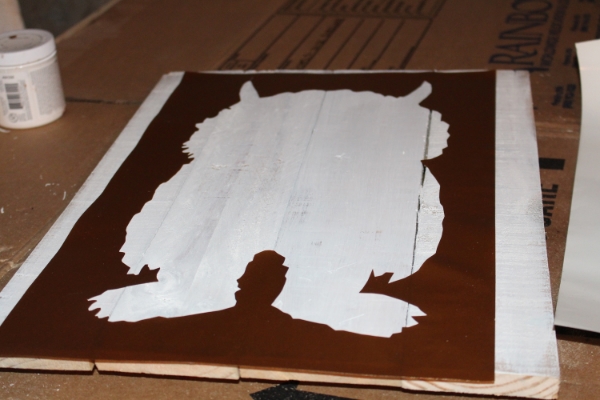
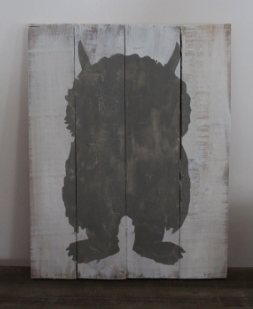
We chose to only use two colors for this sign white for the background and lettering and grey for the monster. For more of a matte look we painted the sign using Americana Decor Chalk paint. One coat should be enough to cover the board and will dry rather quickly since the wood is so porous.
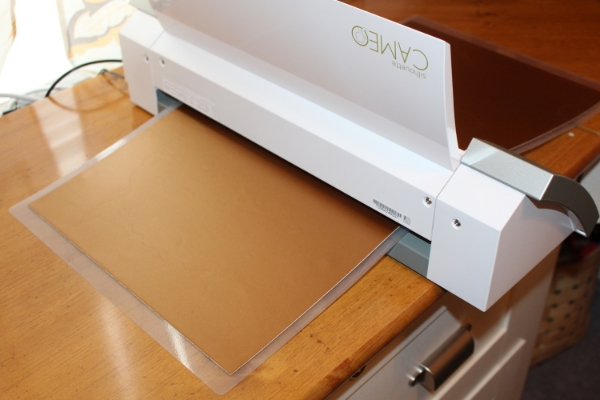
Using my Silhouette Cameo we traced the monster image in Adobe Illustrator and used Silhouette Connect to send the monster to the Silhouette. I choose to cut the stencil on vinyl that I had bought on clearance at Joann fabric. I choose a color I didn’t necessarily like because I am using it as a stencil. To cut the vinyl we used the preset for vinyl on the Silhouette.
To transfer the stencil to the pallet there are two methods you can use. First being to use transfer tape and second because it is so large you can place it by hand. Luckily since this was about 14×18 it was helpful to have another person there. Placing it by hand was simple and also saved some money because transfer tape can add up.
![]()
Using the scrapper or a credit card rub the air out from under the vinyl creating a tight seal so the paint won’t bleed.
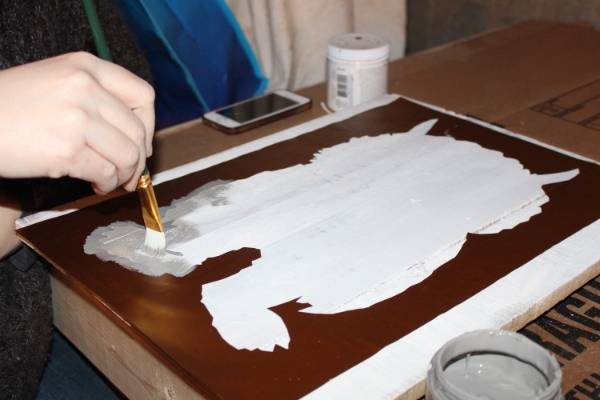
Once the stencil is secure start to paint your monster. Be careful around the edges. I tend to paint from the edge of the stencil inward and try not to oversaturate with paint close to the edge. This will make bleeding less likely.

We painted one coat and left the monster a little rough and uneven on purpose to give that textured shabby chic look.
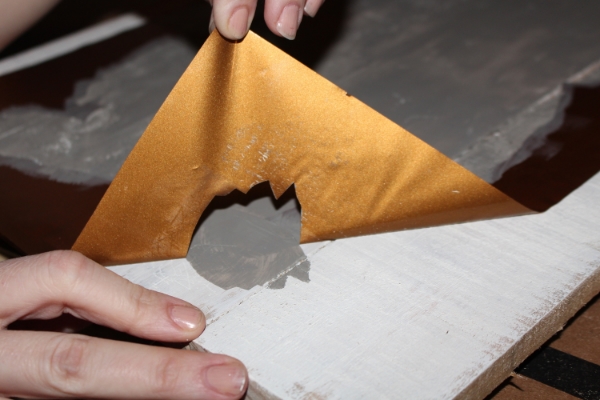
The monster will not take long to dry so after about 5 mins pull back the stencil.
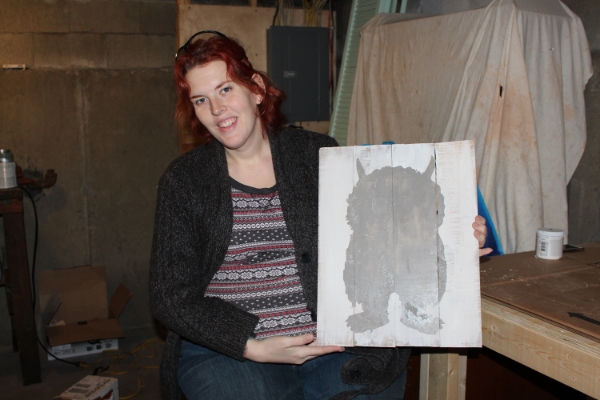
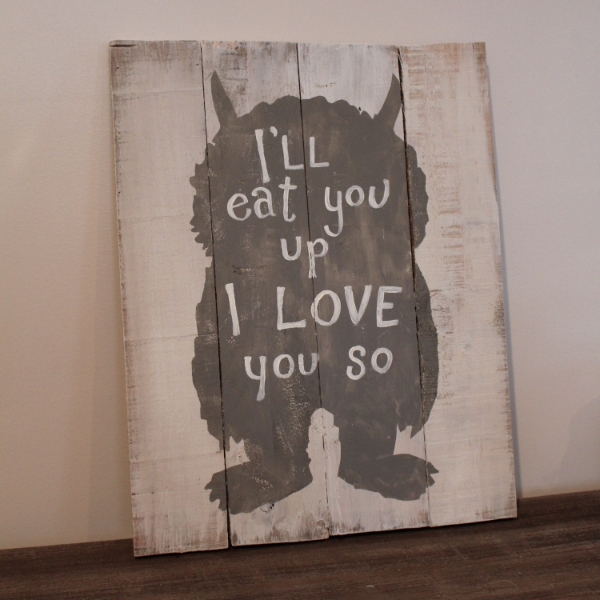
TaDa! We have a monster. Also this is my friend Ellie that is having triplets! You may remember her from when she guest posted on Weekend Craft about How to Make Pickles and also cute free printable labels.
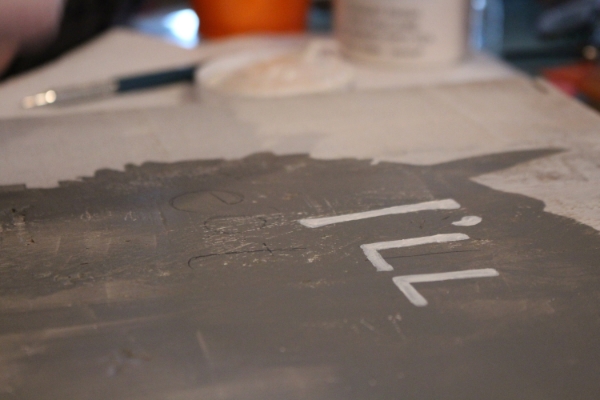
Now you might remember this Ellie is a fabulous illustrator so she actually decided to hand paint the lettering. She drew a guide with pencil first then carefully painted with a small detail brush.
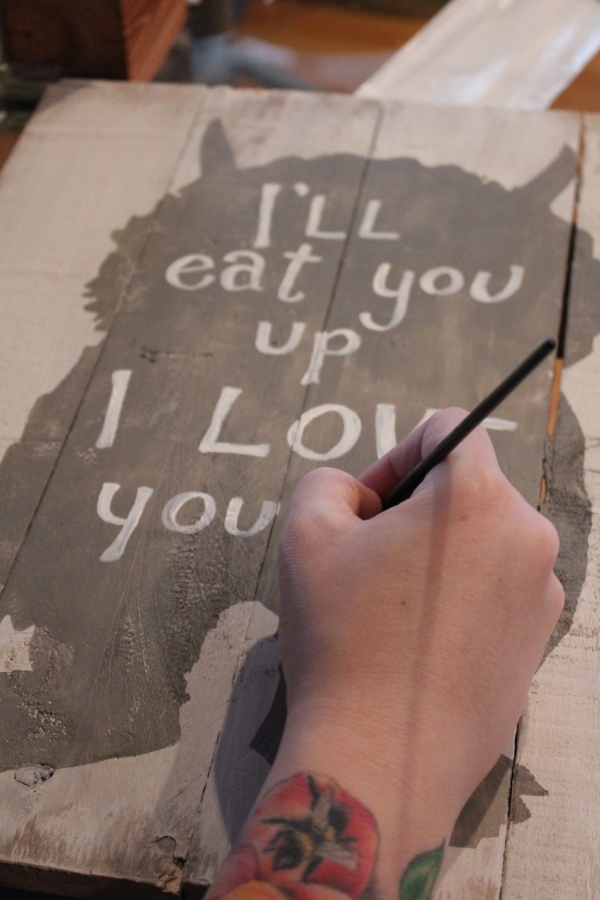
This is one of her favorite quotes from Where the Wild Things Are.
This has to be hands down one of my favorite projects so far. I almost didn’t let her take it home. How cute is this?! I think it makes my favorite list because I not only helped out a friend and got to be part of this special moment in her life but also we collaborated on the project together. So often I craft alone it was nice to have the company of someone else for the day, especially someone artistic and creative as herself.
Want to Check Out More Silhouette Projects?
My Silhouette Challenge buddies and I are all sharing projects on our blogs today, so peruse the projects below for a wealth of Silhouette inspiration!
1. My Paper Craze // 2. The Stamp Doc // 3. Peanut Life Adventures // 4. Creative Ramblings // 5. Pitter and Glink // 6. The Thinking Closet // 7. Single Yet Married Mom // 8. unOriginalMom // 9. Sisters, What! // 10. Where The Smiles Have Been // 11. From Whine to Whine // 12. Adventures in All Things Food // 13. Practically Functional // 14. Patina Paradise // 15. Please Excuse My Craftermath… // 16. Weekend Craft // 17. Two Purple Couches // 18. Ribbons & Glue // 19. TitiCrafty // 20. Simply Kelly Designs // 21. Confessions of an Overworked Mom // 22. Get Silvered


Michelle – I love this. If I ever have kids, I’ll have to hunt you down to make me one of these. Even if I don’t I might still come knocking on your door!
Seriously just adorable! You did an amazing job on this! Pinning!!
This is fabulous and Ellie looks amazing!
I totally love this….like wildly love this!!!
Hi I love this. I wanted to know if you could tell me what image you used, I can’t seem to find one that has all the the fuzzy fur detail like yours.
Thanks