This post contains affiliate links, please read our disclosure policy.
This is a sponsored post with DecoArt but all opinions are my own. This post may contain affiliate links.
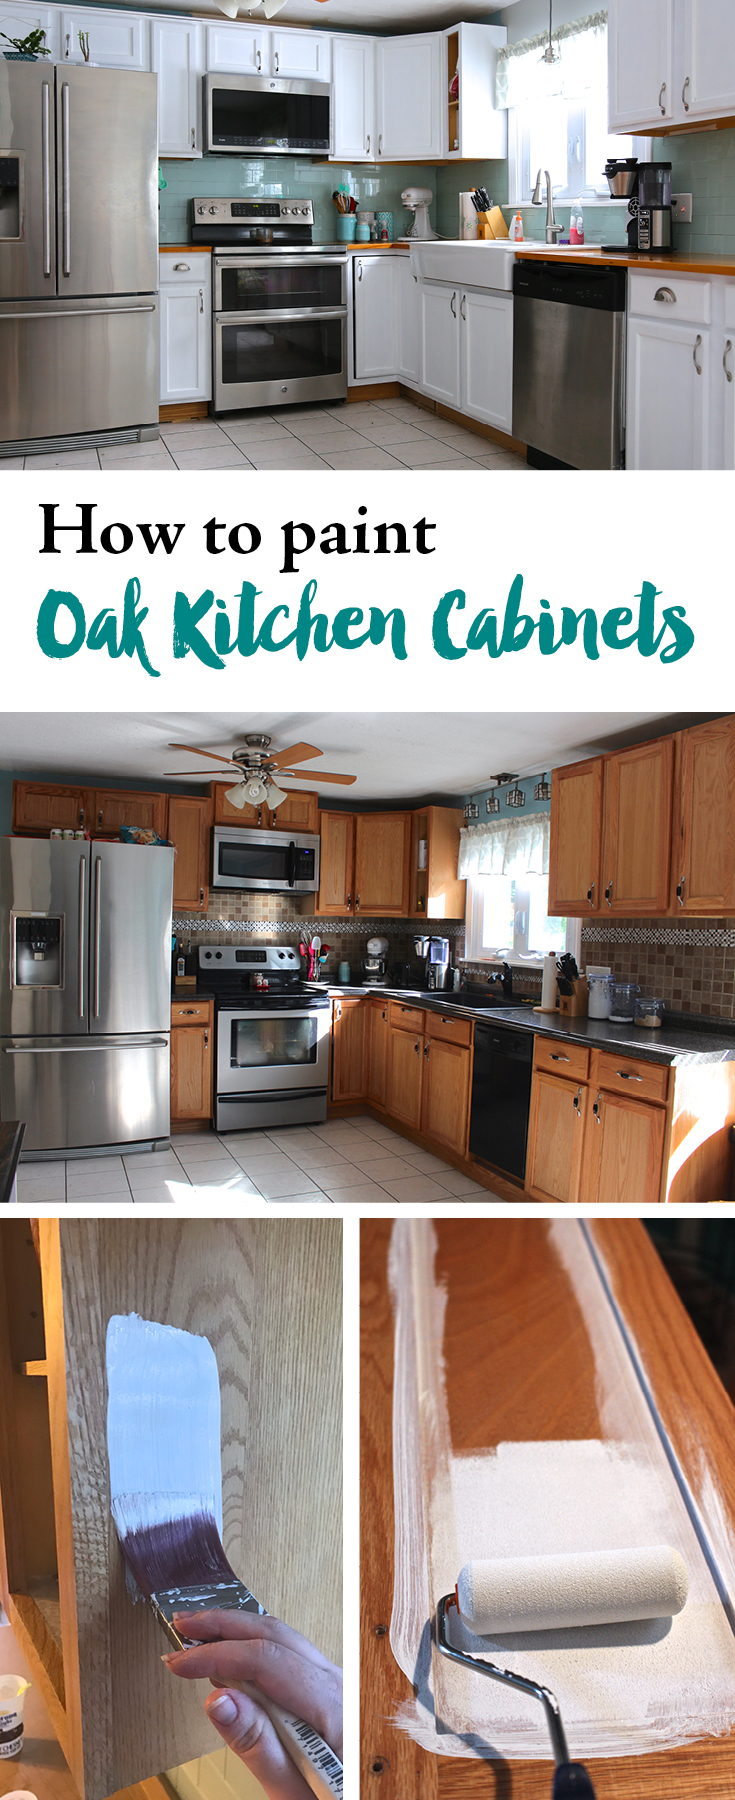
The time has come! It’s time to paint some cabinets. Today I am going to walk your through step by step how I painted my oak cabinets with DecoArt Satin Enamel paint. Now if you haven’t been following along on my kitchen renovation make sure to to check out all the projects here. Including cleaning cabinets with TSP, removing backsplash, finishing the butcher block countertops, installing butcher block and installing a farmhouse sink.
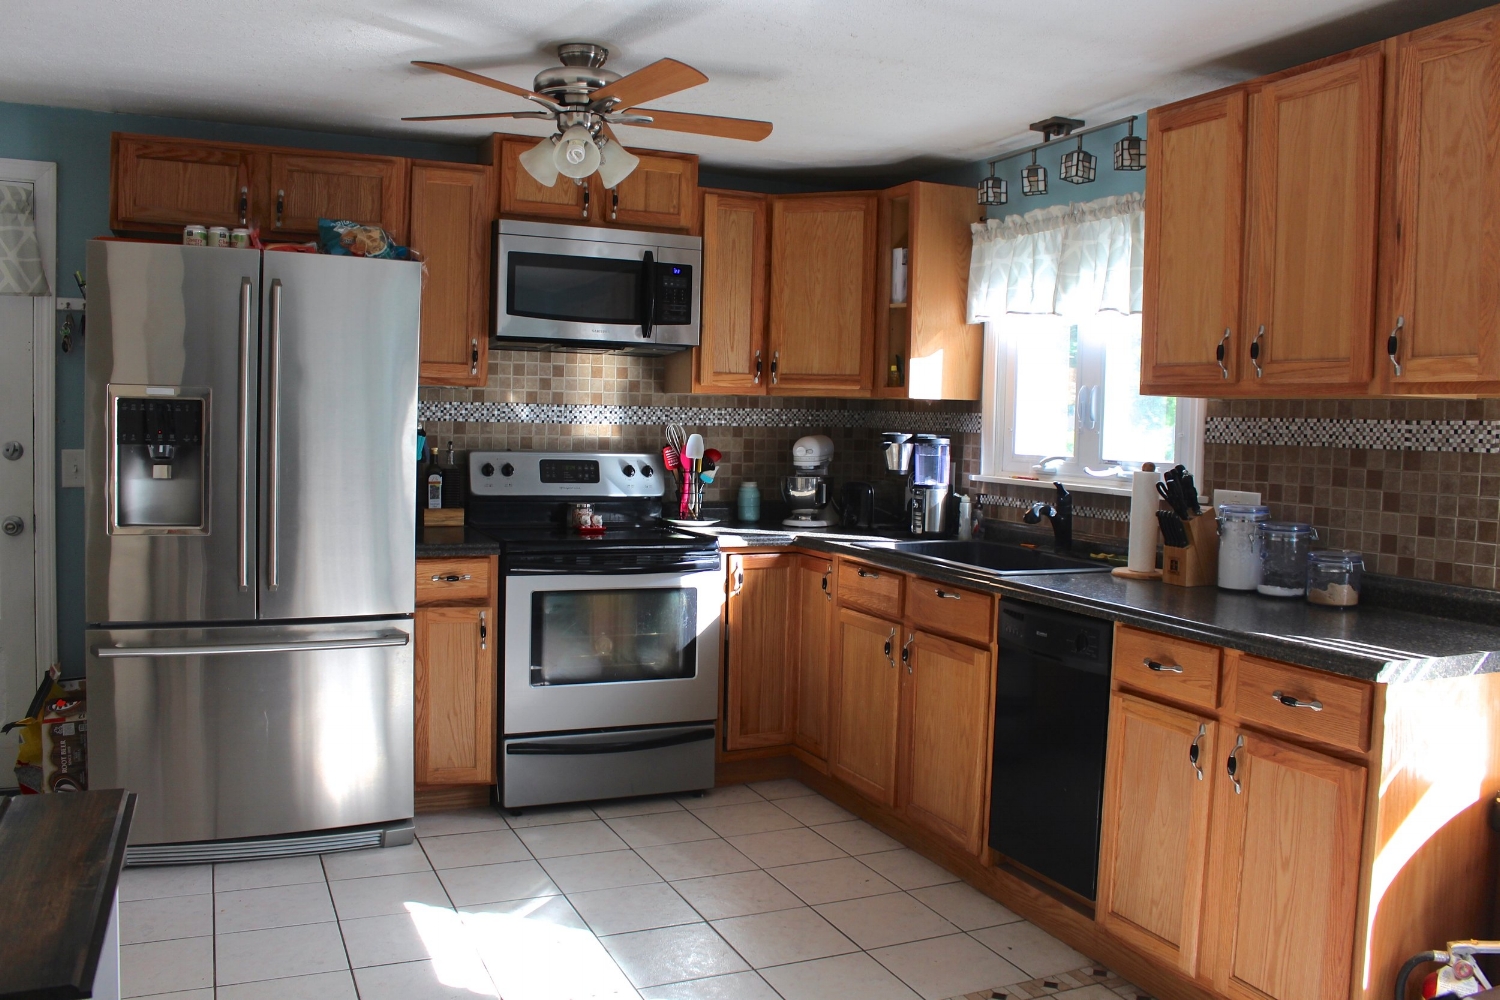
Now when I bought my house I knew one of the first things I wanted to do was to get rid of the oak cabinets. I am not a big fan of the 1980-1990s oak tone. Well a new kitchen was not in my budget but paint was! I’ve partnered up with DecoArt to show you guys how a little bit of paint can make a drastic change. Don’t be intimidated to paint your cabinets.
Step 1 – Clean your cabinets with TSP
Before painting you want to make sure you clean your cabinets and not just with Windex. Since you do a lot of cooking in your kitchen over the years there is grease that travels through the air and sticks to your cabinets. You want to clean your cabinets with TSP before sanding. Don’t skip this step. You can read fully how to do it here.
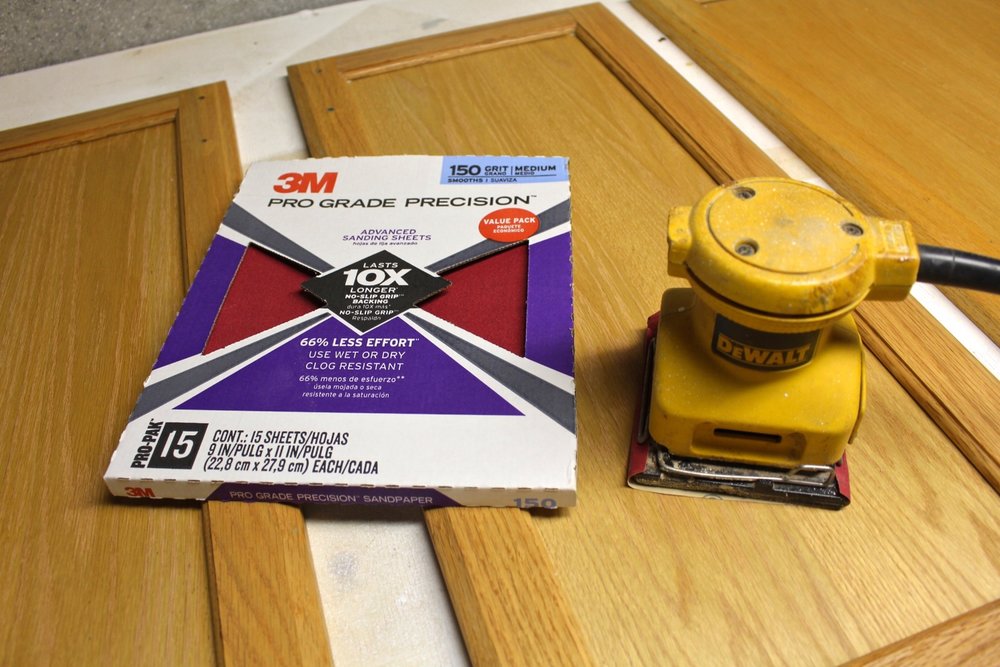
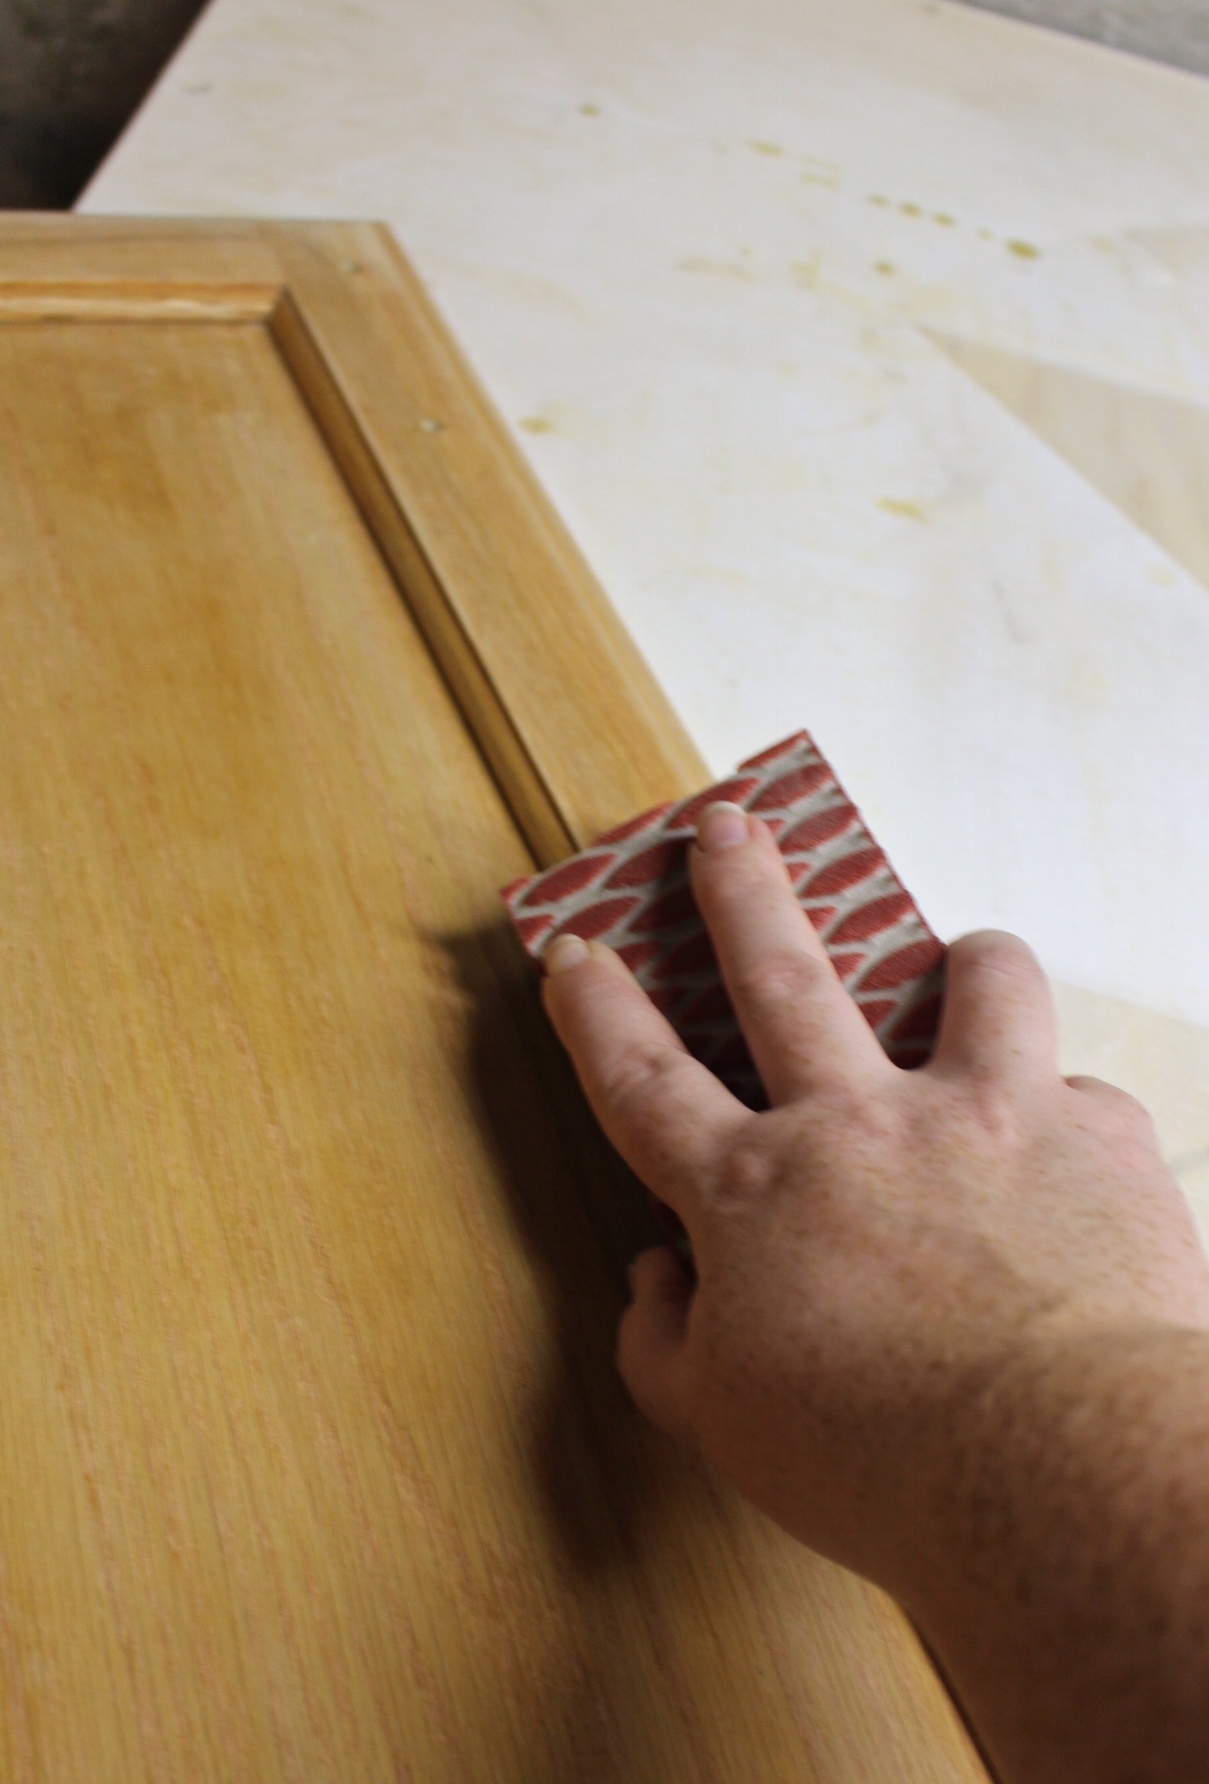
Step 2 – Sand your cabinets
Sanding your cabinets that sounds like a lot of work. It is actually more intimidating than it actually is. They key is to make a plan. My plan was to sand all the doors first. I did four at a time setting up my work bench. I grabbed my palm sander and 150 grit sandpaper and started to sand the fronts of the door. This help gets the finish that was orginally used on the cabinets off and to create a nice pourous surface to paint.
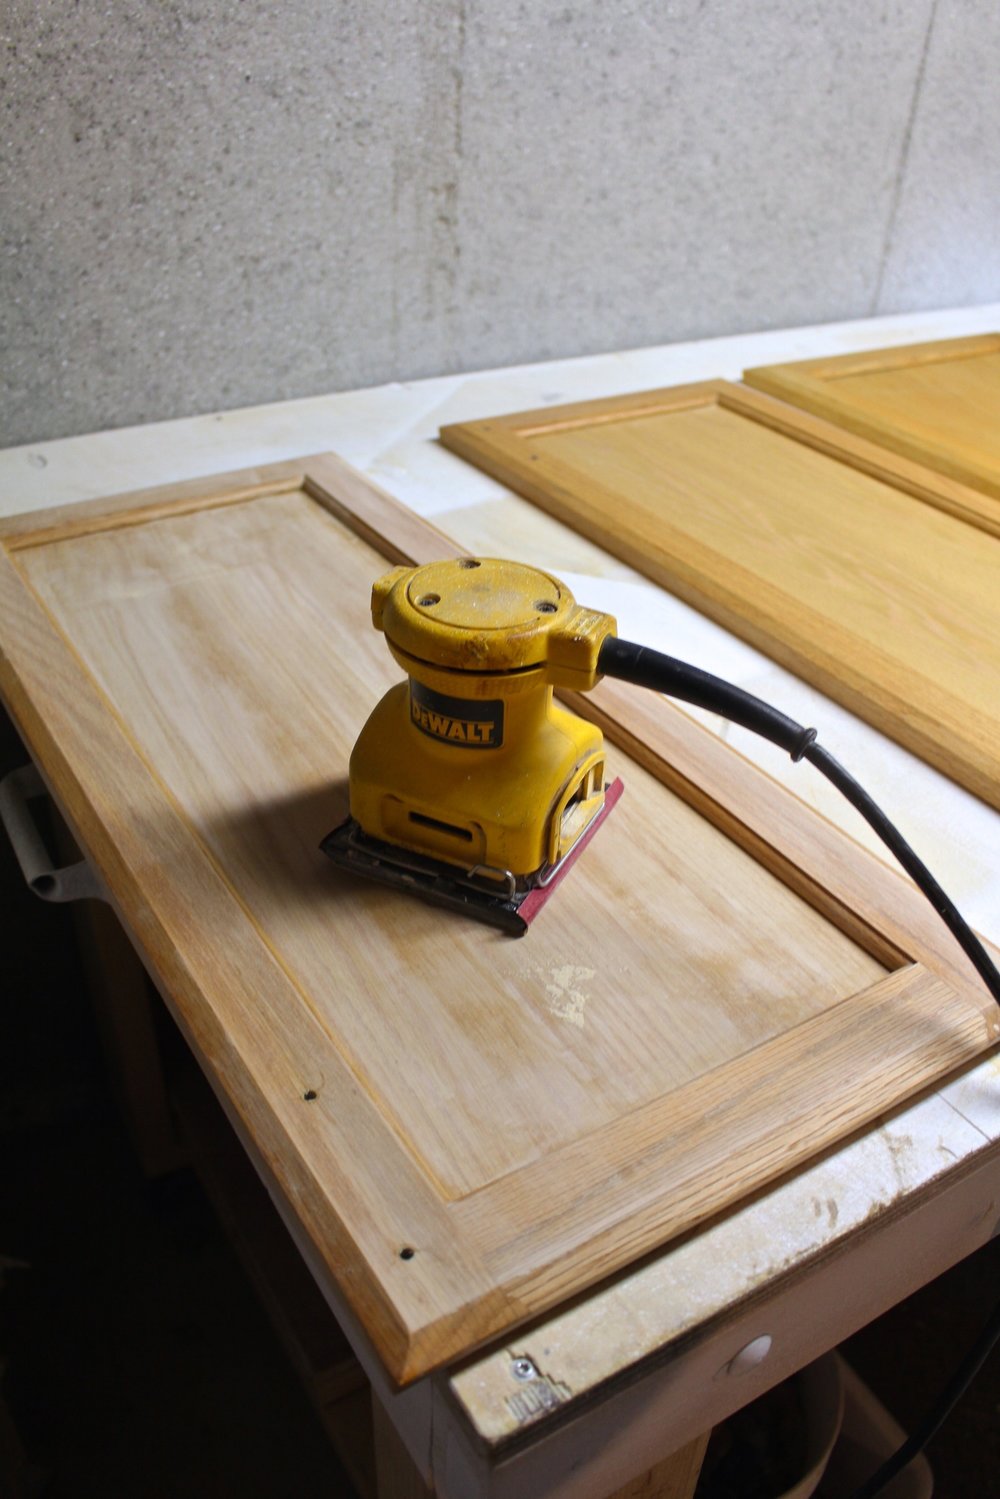
I sanded all the flat surfaces with the palm sander and left the beveled and curved edges to sand by hand. I used a sanding sponge to sand these more intricate areas. From start to finish each door should take 5-10 minutes. Any longer you are sanding too much. You just want to make sure you have a smooth surface. Now before the next step you are going to want to clean up all the dust on the doors. I brushed them off and then used a damp rag to get the remaining dust.
You are going to want to do the same sanding steps on your kitchen cabinets. I used the palm sander and the block again. Now this can get dusty so I suggest emptying your cabinets and blocking off your doorways to contain the dust. I did this by hanging an extra flat sheet in a doorway with a few thumb tacks.
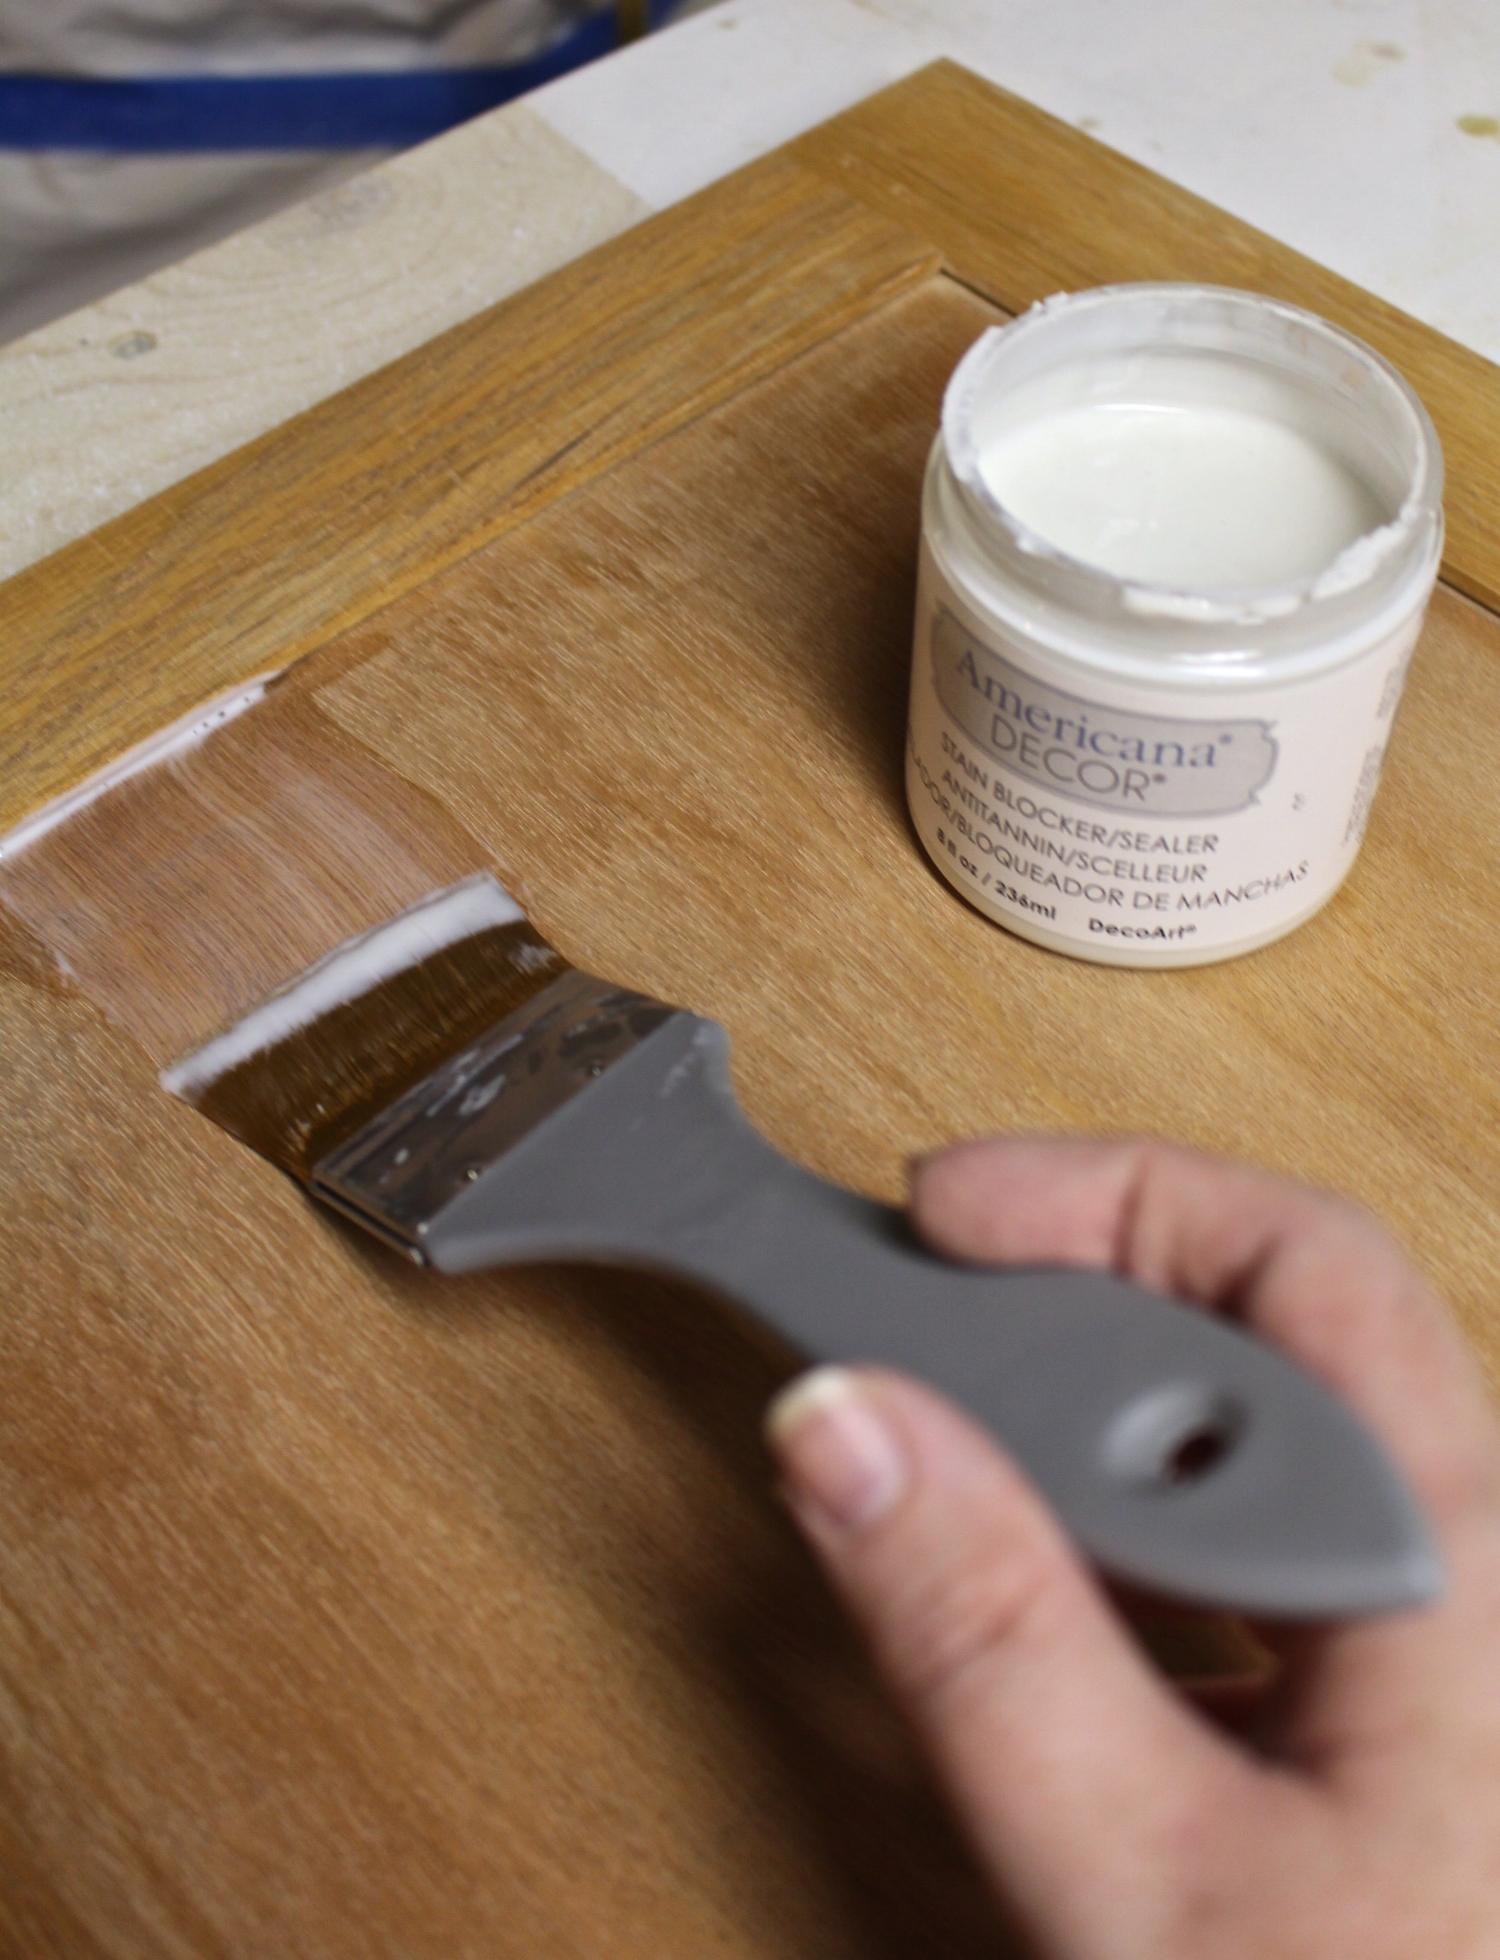
Step 3 – Stain Blocker
We are getting closer to painting just one more step. Since oak can be difficult to cover the grain we are going to be using DecoArts Stain Blocker. The stain blocker seals the wood from coming through the paint. Apply a thin coat to both the cabinets and the doors.
Step 4 – Paint
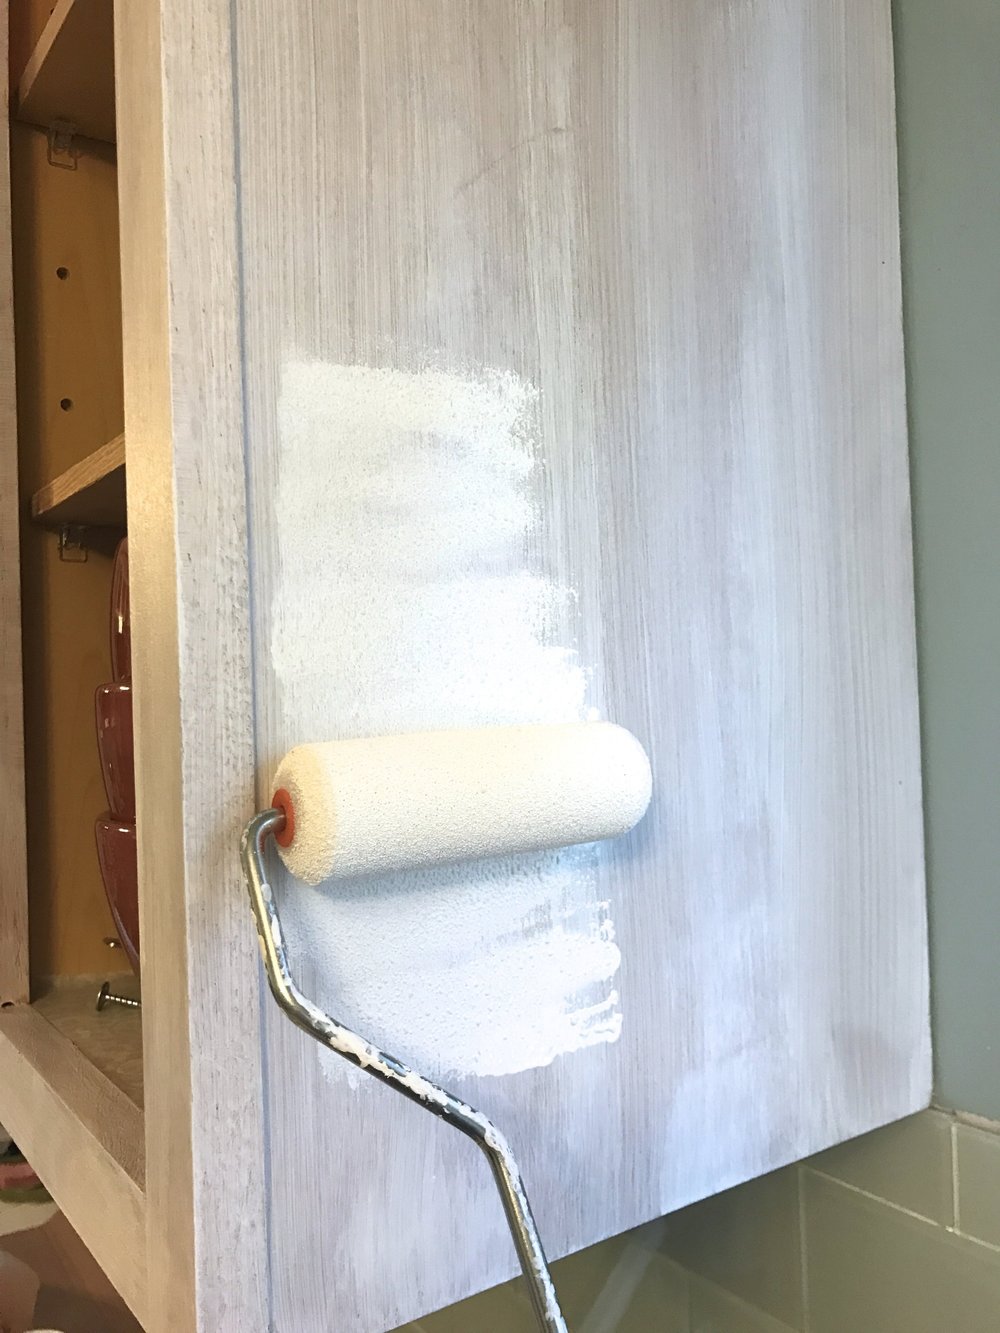
Now that our stain blocker is dry it’s time to paint! I decided to use Deco Art Satin Enamel paint because the acrylic is designed to be durable in high traffic areas like your kitchen and bathroom. I also loved that it was a satin finish so my cabinets would not be overly glossy. Now you don’t have to sand or prime with this paint but because of what shape my cabinets were in I knew sanding would be the best way to go.
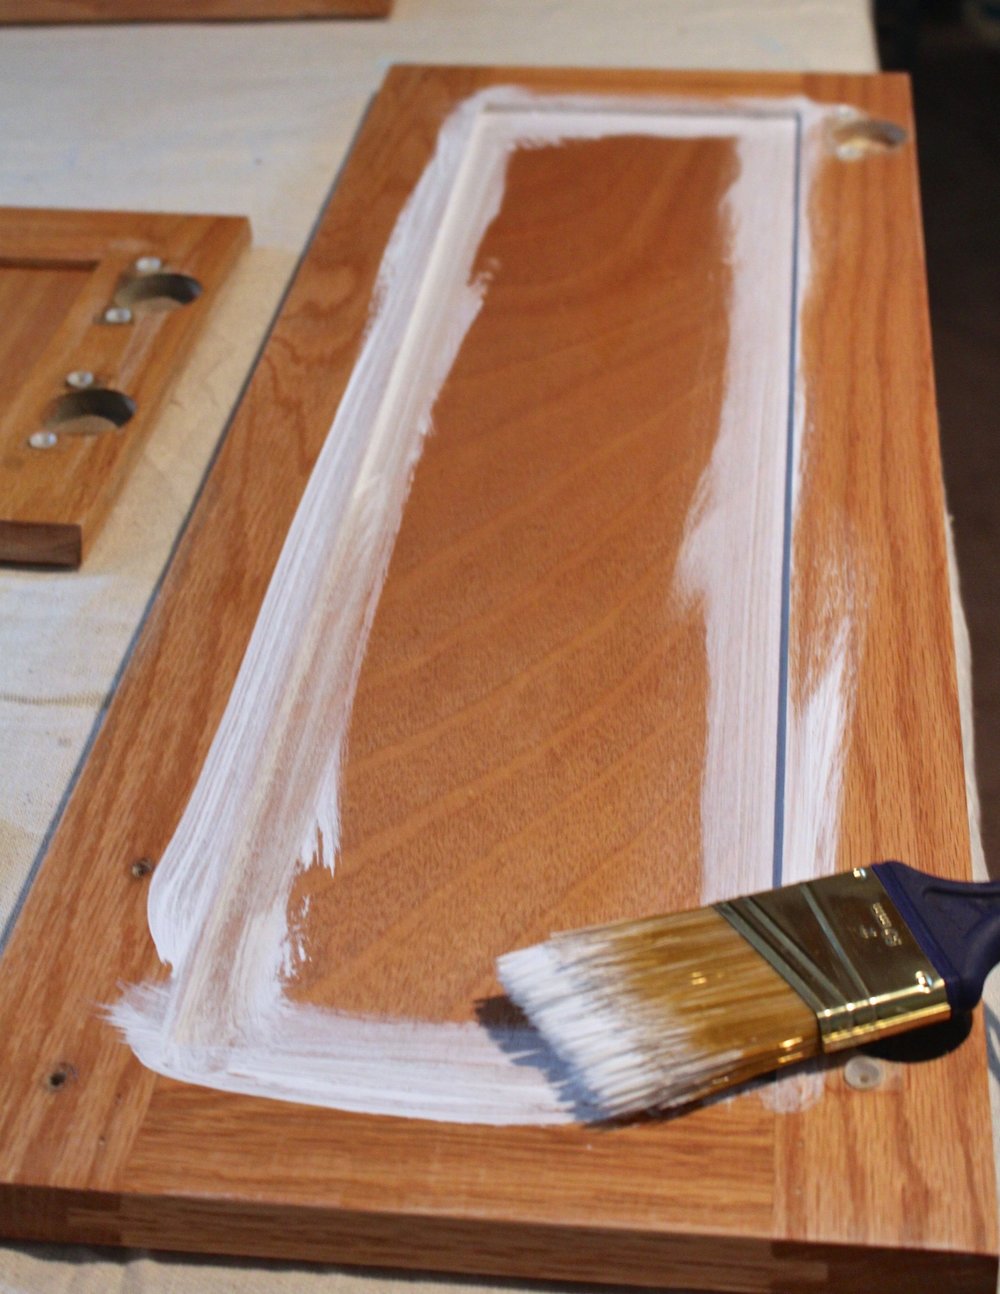
I started by painting the cabinet doors. Setting up a workspace with 5 or 6 doors and starting on the backside of the doors. I used a paintbrush to get in all the corners first.
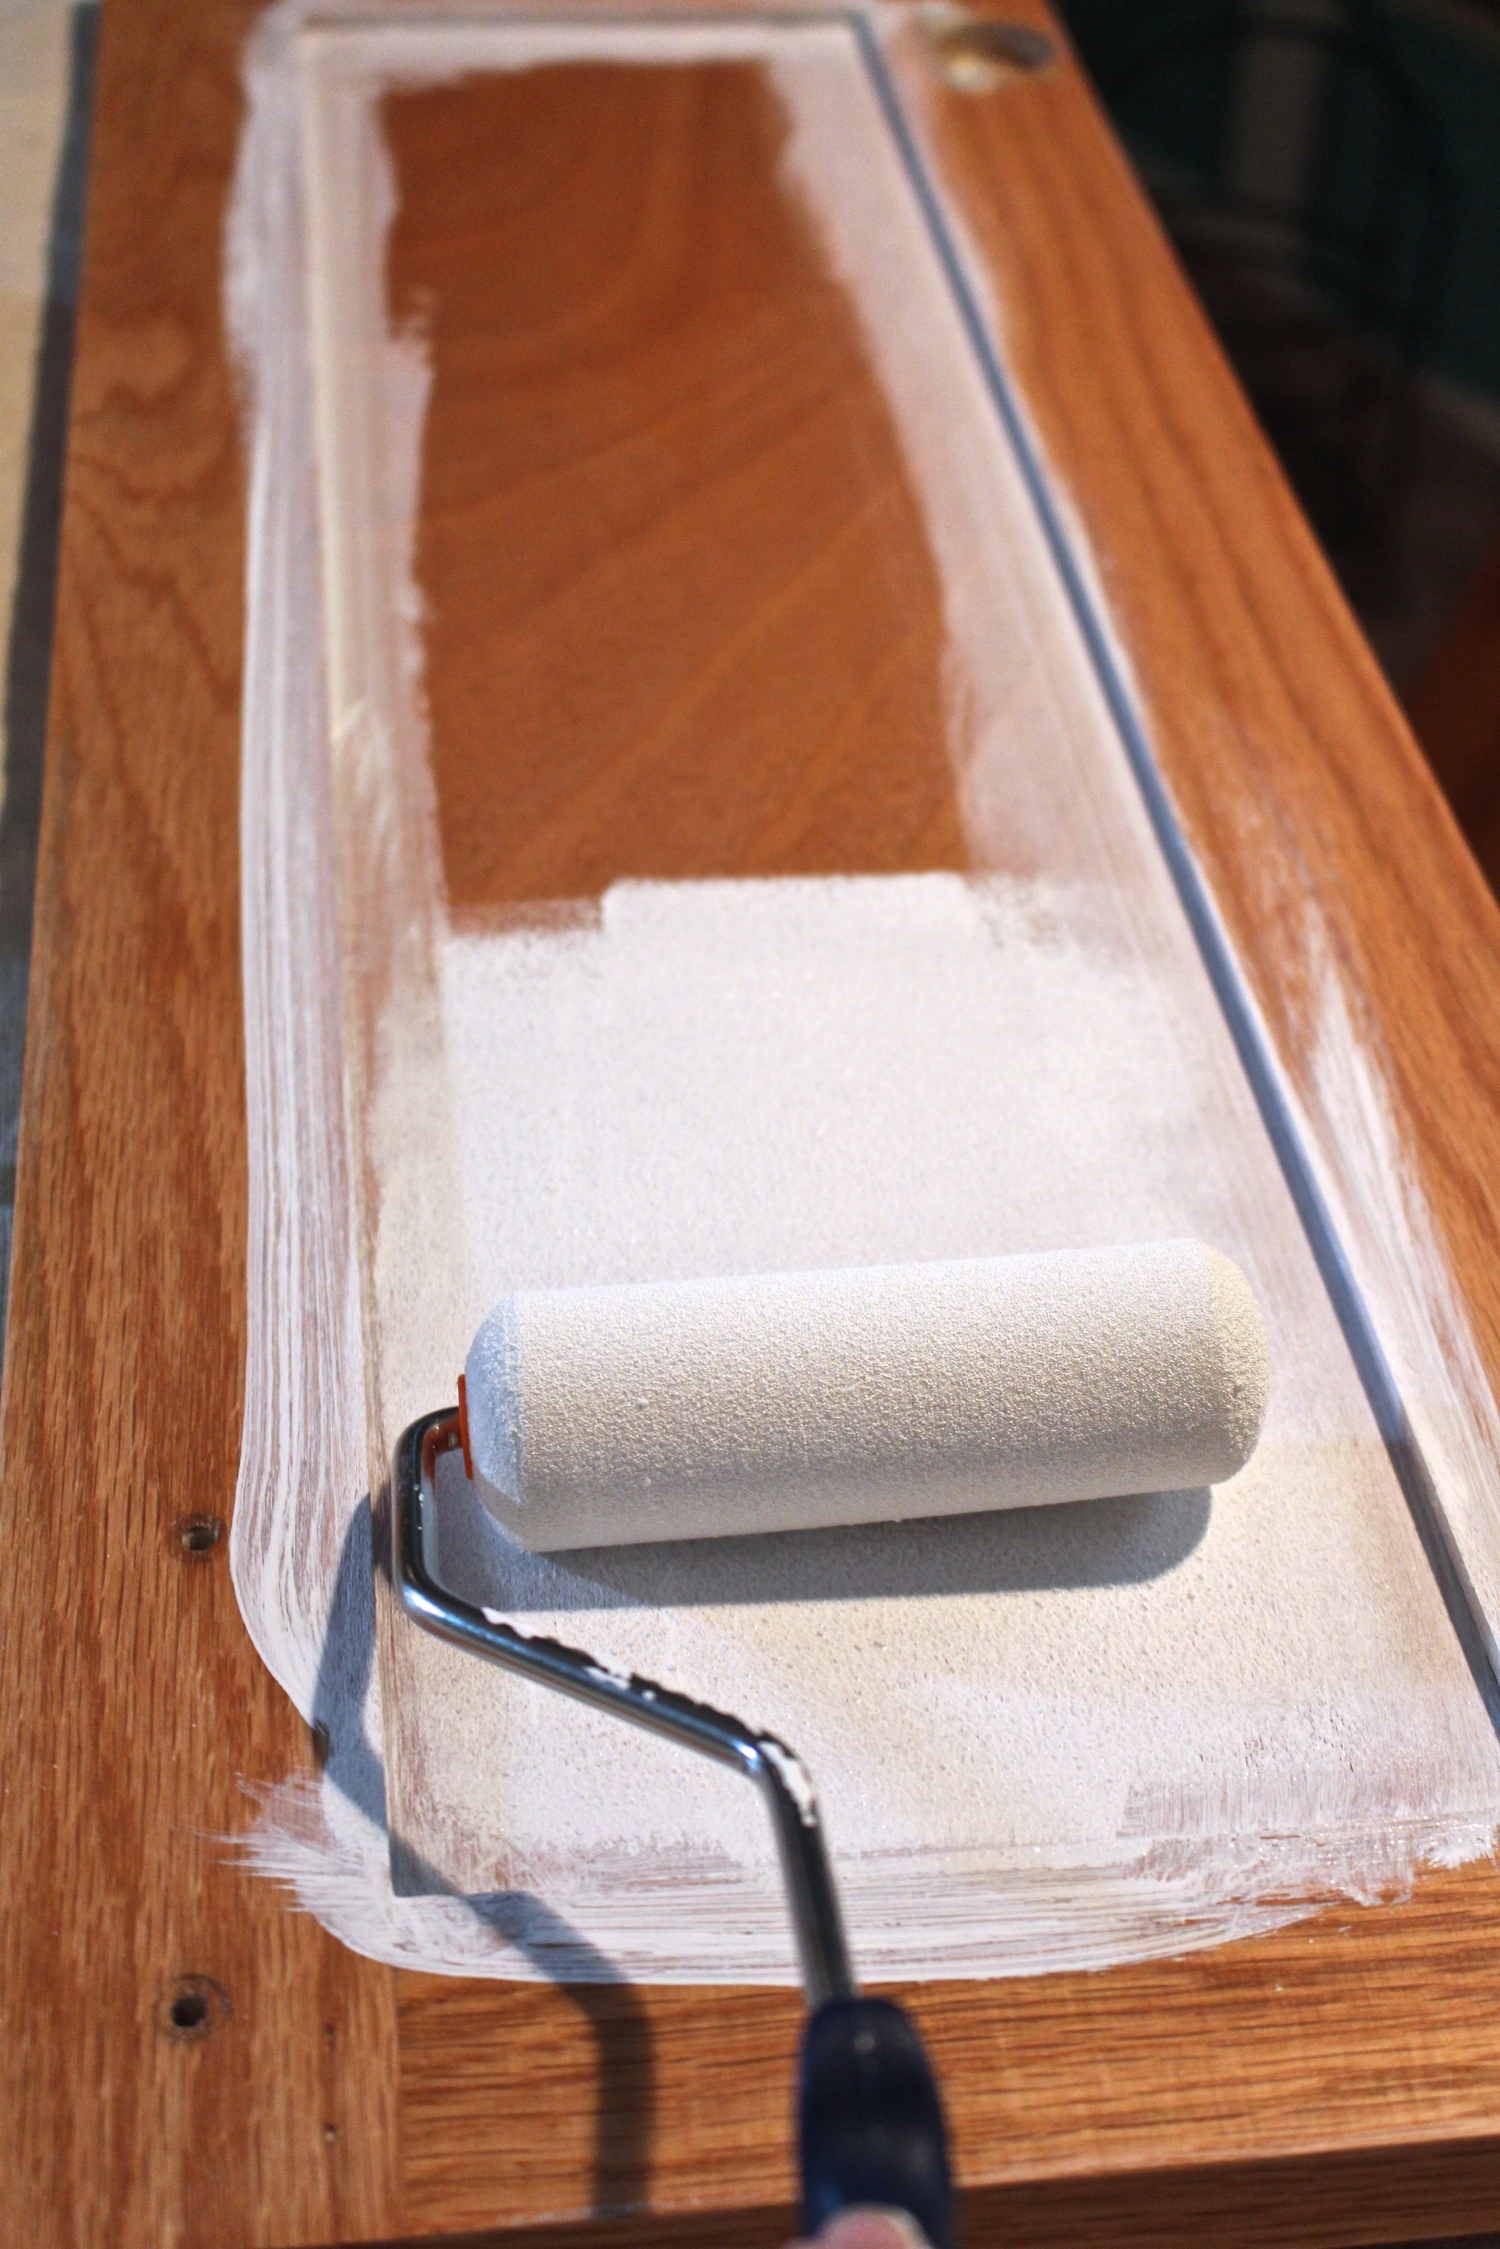
Then since it’s mostly flat surfaces I used a cabinet roller. This will make this job go by much faster. Now I took my time painting I would do one coat over the course of the day and the next day do the other side. I knew I wanted to be patient and let a good amount of time pass in between coats. Also I just had so many projects going on in the kitchen at once.
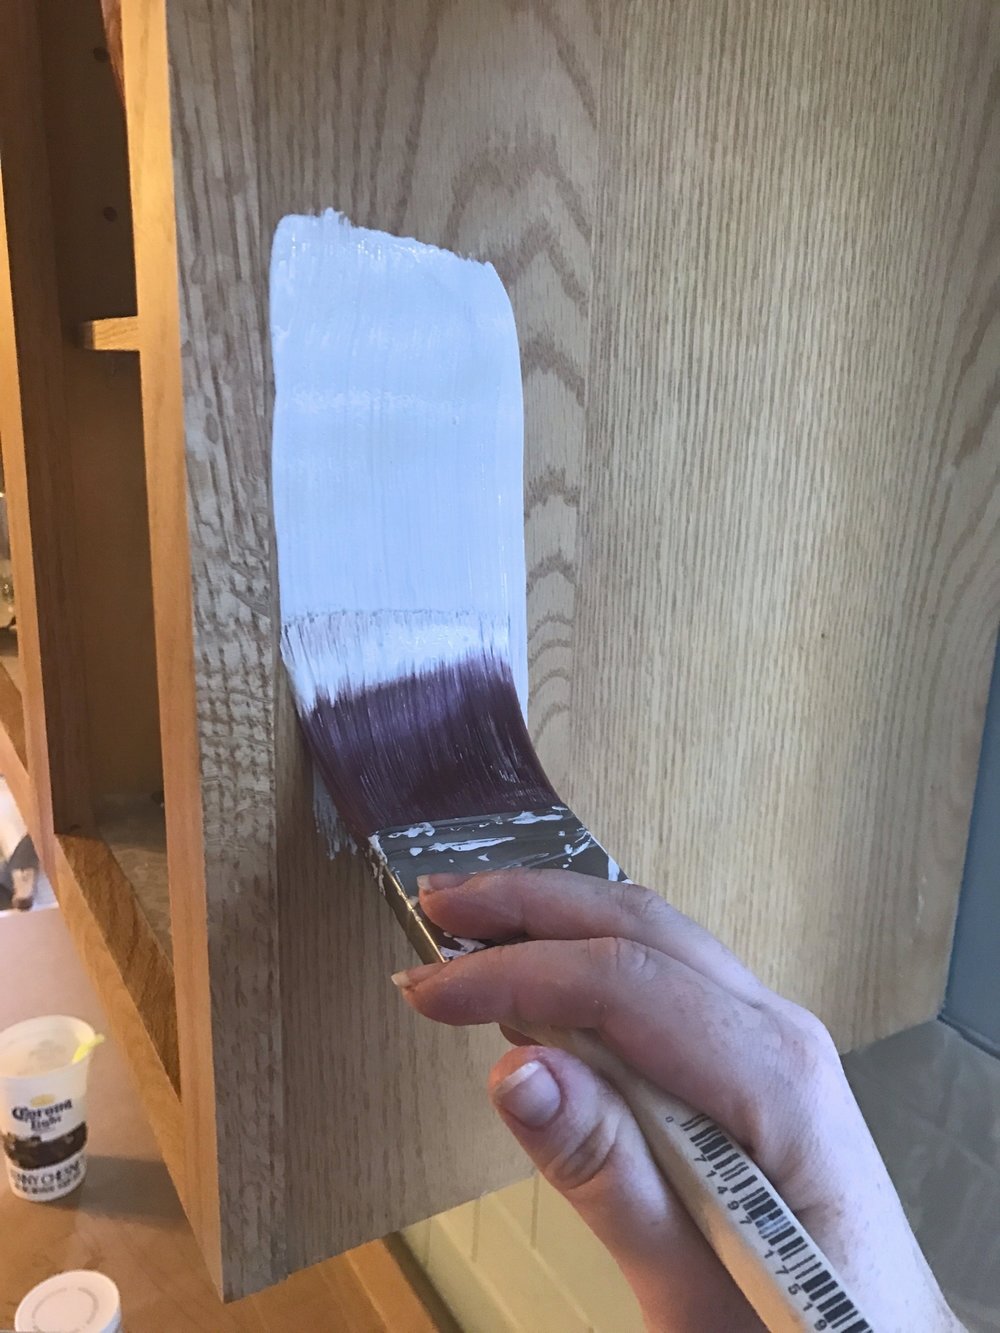
Once your doors are painted, I painted them with 3 coats, it’s time to start painting the actual cabinets. This is where you start to see the big difference. This finally helped me feel like I was making progress and not just hosting Thanksgiving with no cabinet doors…. yes I did that.
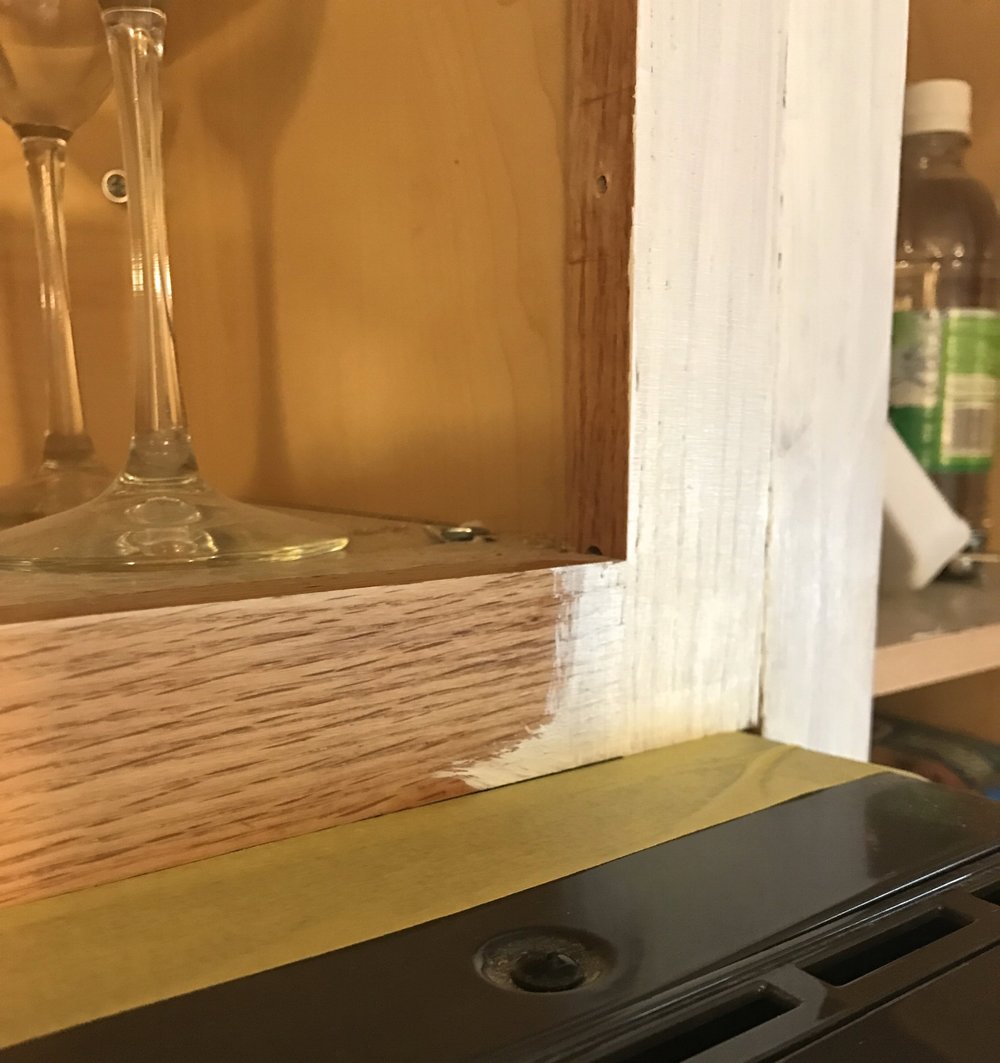
Now you are going to want to tape off any areas that touch the walls, backsplash or appliances.
And once again on your flat surfaces use a roller when you can it will help speed things along. I painted the actual cabinets in one Saturday. Letting the coats dry in between.
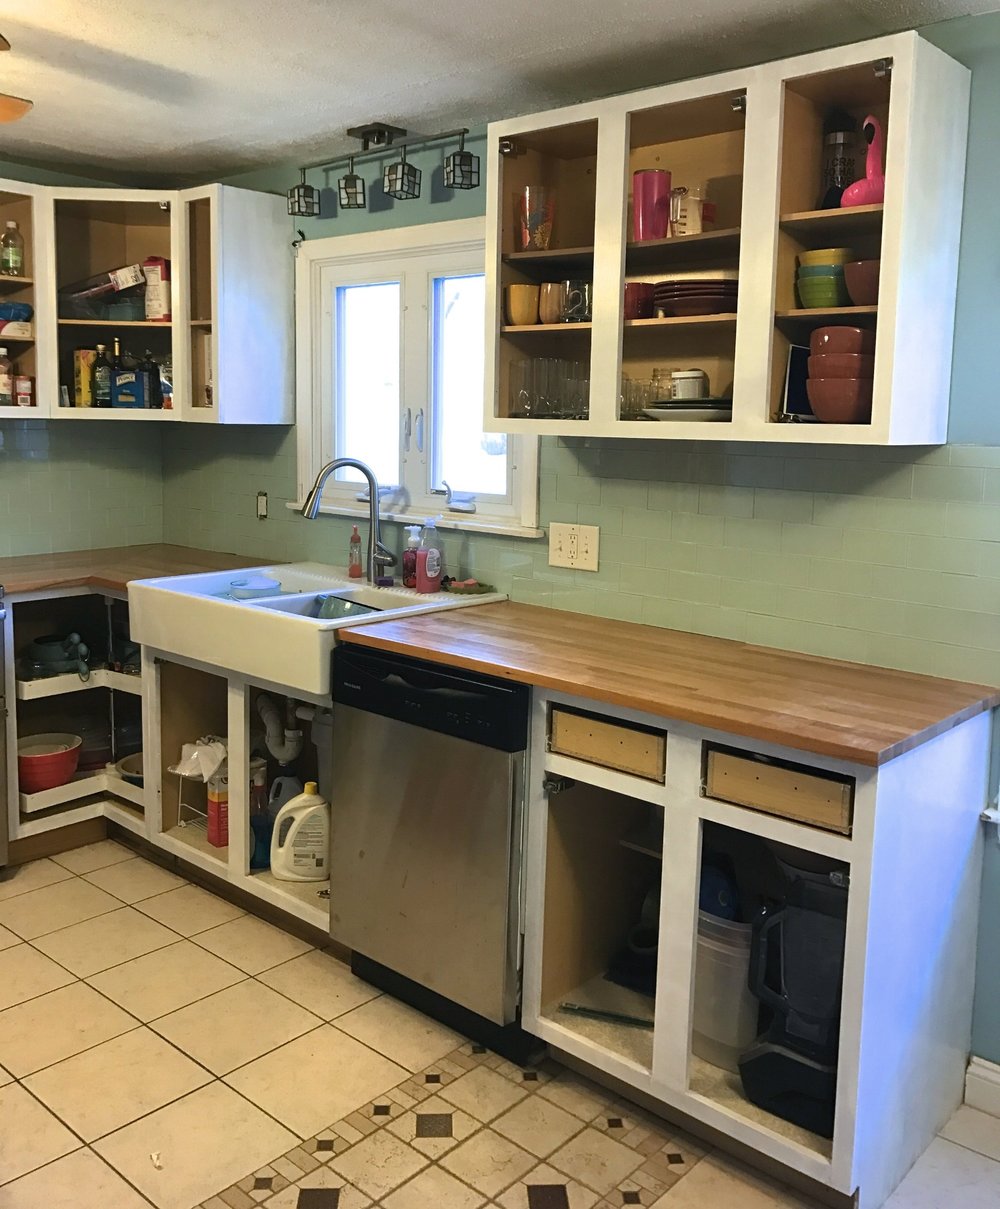
Looks like the kitchen is read for some cabinet doors and maybe some paint up on the walls.
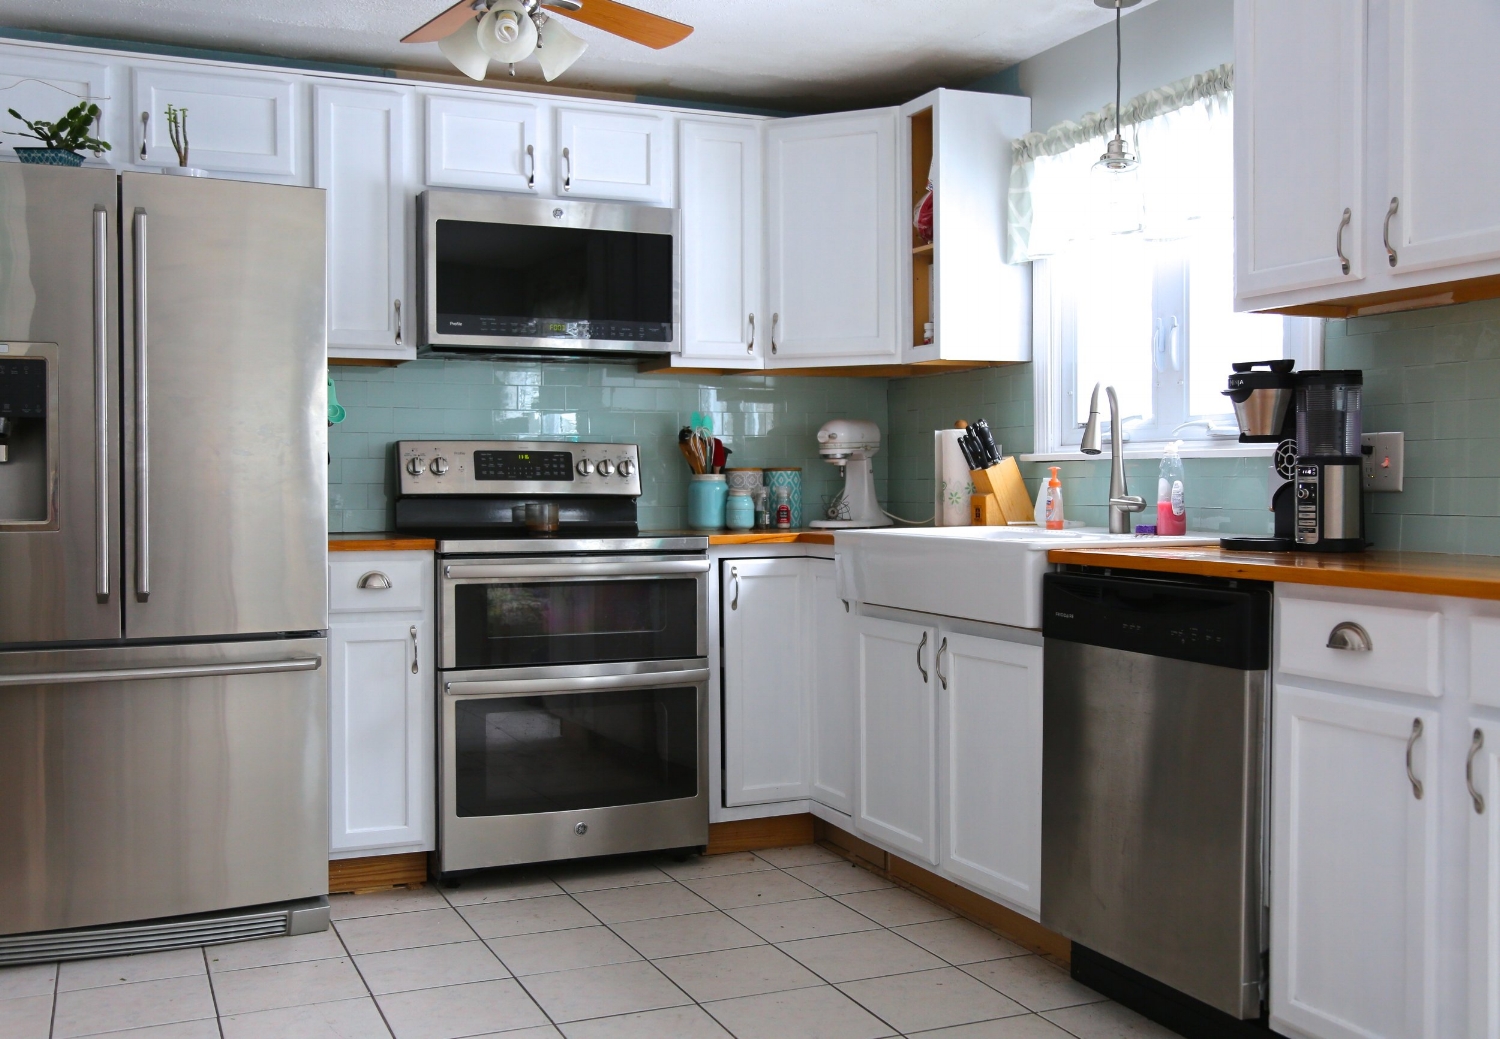
Guys I cannot tell you how in love I am! Now the kitchen is not completely done but it is almost there! Next up I need to install the crown molding to extend the cabinets to the ceiling. This will give the cabinets more of a custom/higher end feeling. Also I need to install kick plates to the bottom of the cabinets.
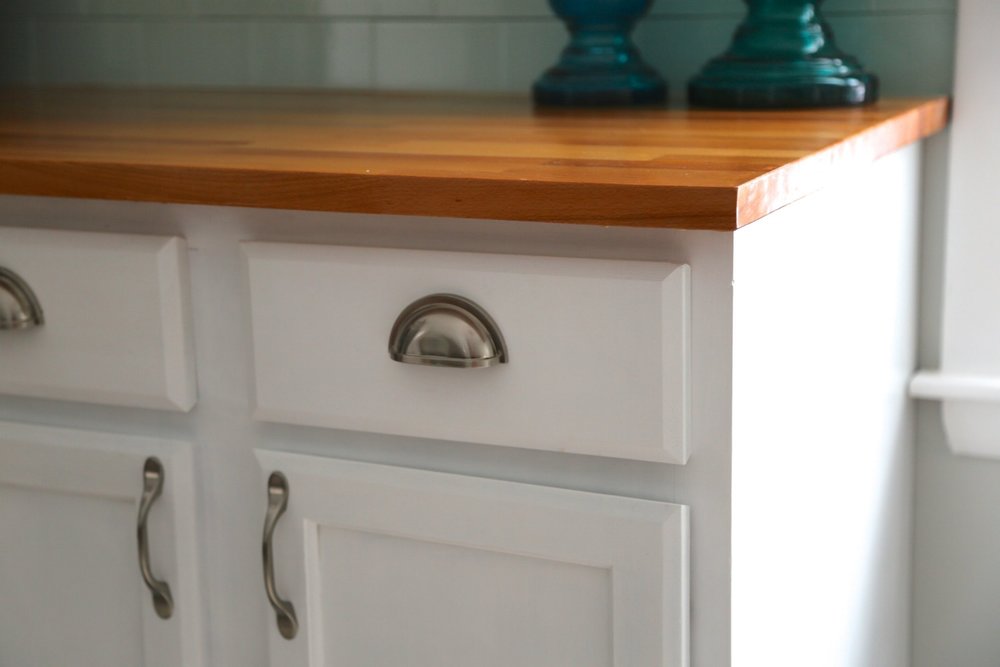
I truly love the finish. You never would have known these were that oak color. It’s such a smooth finish it looks like I hired a crew to come in. Best part of all I painted the cabinets all by myself I did not need to call a single soul for help. It was something I could tackle on my own. There is no better feeling than that! As a single female home owner I just want to empower others that if there is something you want to change there is a way to figure out how to do it without breaking the bank and without always needing to hire a contractor. Use the resources you have and stay within your means. If you can’t afford a new kitchen a little bit of paint can go along way without hurting your wallet.


I am planning to paint my oak cabinets soon, too! Thanks for he great tutorial.
As an aside, how do you like your butcher block counter?
Hey Carissa!I absolutely love my butcher block countertops. I do suggest that you treat them before installing them. They will last much longer that way!https://weekendcraft.com/journal/how-to-finish-ikea-butcher-block-countertops
Wow! What a huge difference! They look so good!
Thanks so much Jenna. Can’t wait to show you guys once the crown molding is done.
What a difference! They really give the kitchen a whole new look. I love the value of paint when it comes to redecorating 🙂
Paint can do wonders!
What a gorgeous makeover and this paint looks amazing!
Love the difference! Looks so great!
I moved into a house with RED kitchen cabinets and painted them white. It completely changed the whole look. I love your transformation!
Updating my cabinets seems like a change that my kitchen needs. I have wooden cabinets that are looking pretty old and worn out. Installing a new set of cabinets that look freshly painted would really help to freshen up my kitchen. https://kitchentuts.com/
It is a no-fluff step by step guide tocreate a part-time woodworking business,selling easy-to-build wood crafts, from HOME…with NO capital or experience required.
https://www.woodprofits.com?vhbshygdf398432