This post contains affiliate links, please read our disclosure policy.
How to create your own fusible fabric for iron-on appliqués with your Cricut Maker.
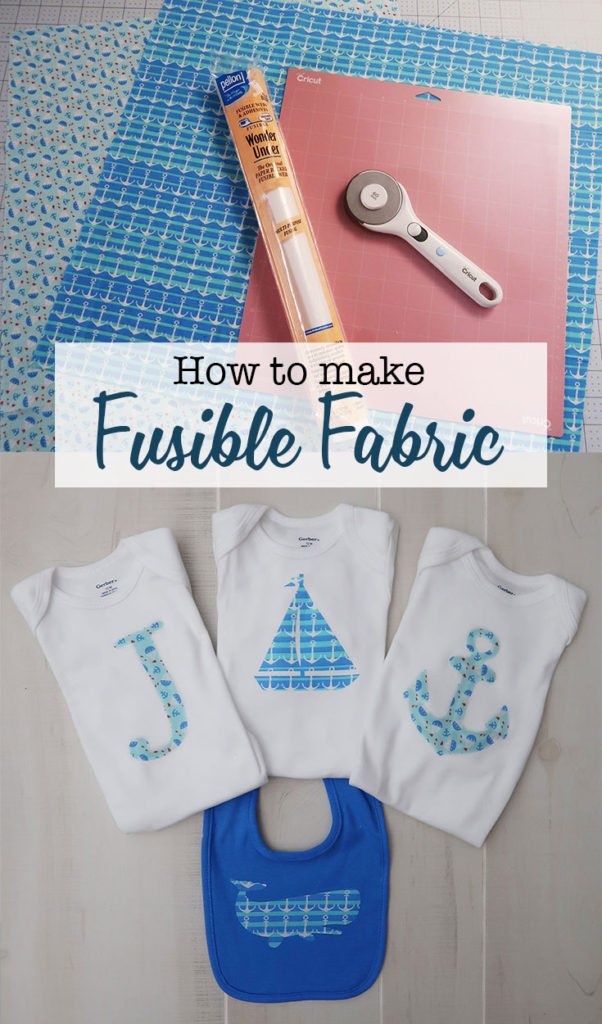
I love customizing clothing and accessories with my Cricut. Mostly I use iron-on and heat transfer vinyl but today I want to show you how to make an iron-on appliqué with regular cotton fabric. This is a great way to create a no-sew appliqué.
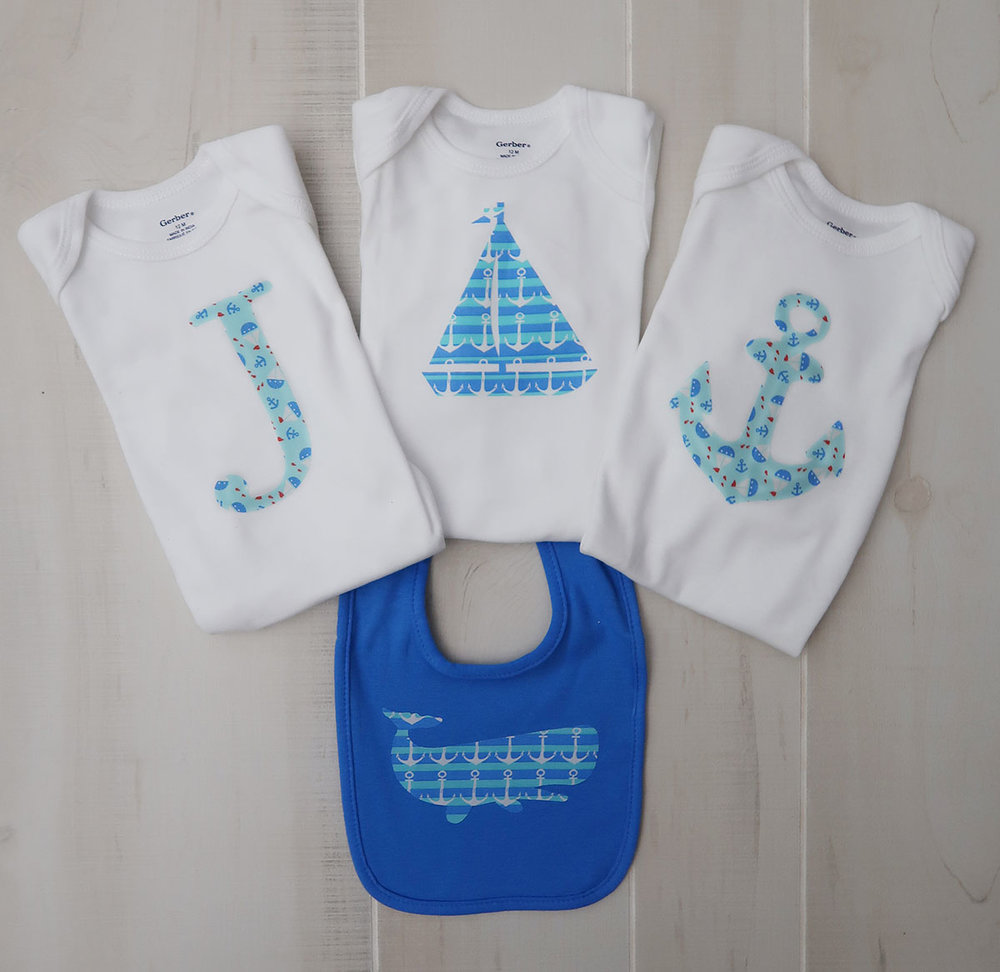
Now I am not an avid sewer. In fact I bought a sewing machine after Christmas and it is collecting dust. So if you aren’t a skilled seamstress this is the project for you! Creating these DIY fabric appliqués are perfect for onesies, t-shirts, tote bags, really the opportunities are endless. Today I am going to be making some onesies for a baby shower.
Throwing a baby shower soon? Have you seen my step by step tutorial on how to create a DIY onesie station at your next baby shower?
This post contains affiliate links.
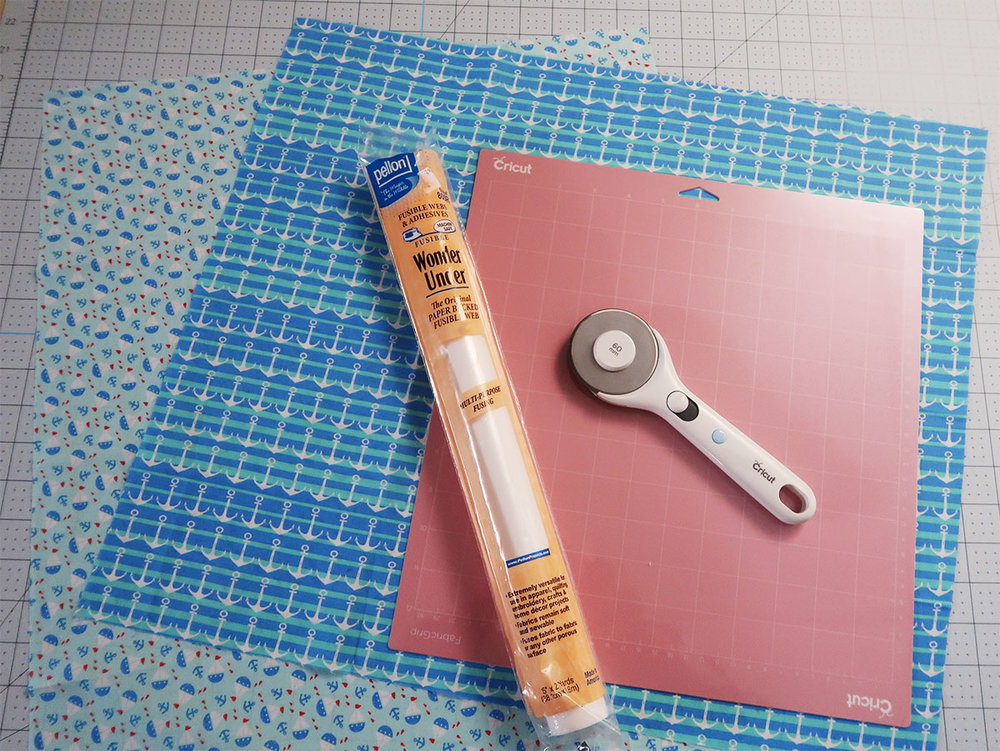
What you’ll need
-
Design Space Files for whale and sailboat
-
Design Space Files for anchor
What is fusible fabric?
Fusible fabric is fabric that will iron on to another material. You can make fusible fabric by taking the fabric and adhering it with heat to fusible web interfacing like Heat Bond or Wonder Under. Fusible fabric is a no sew alternative to make appliqués.
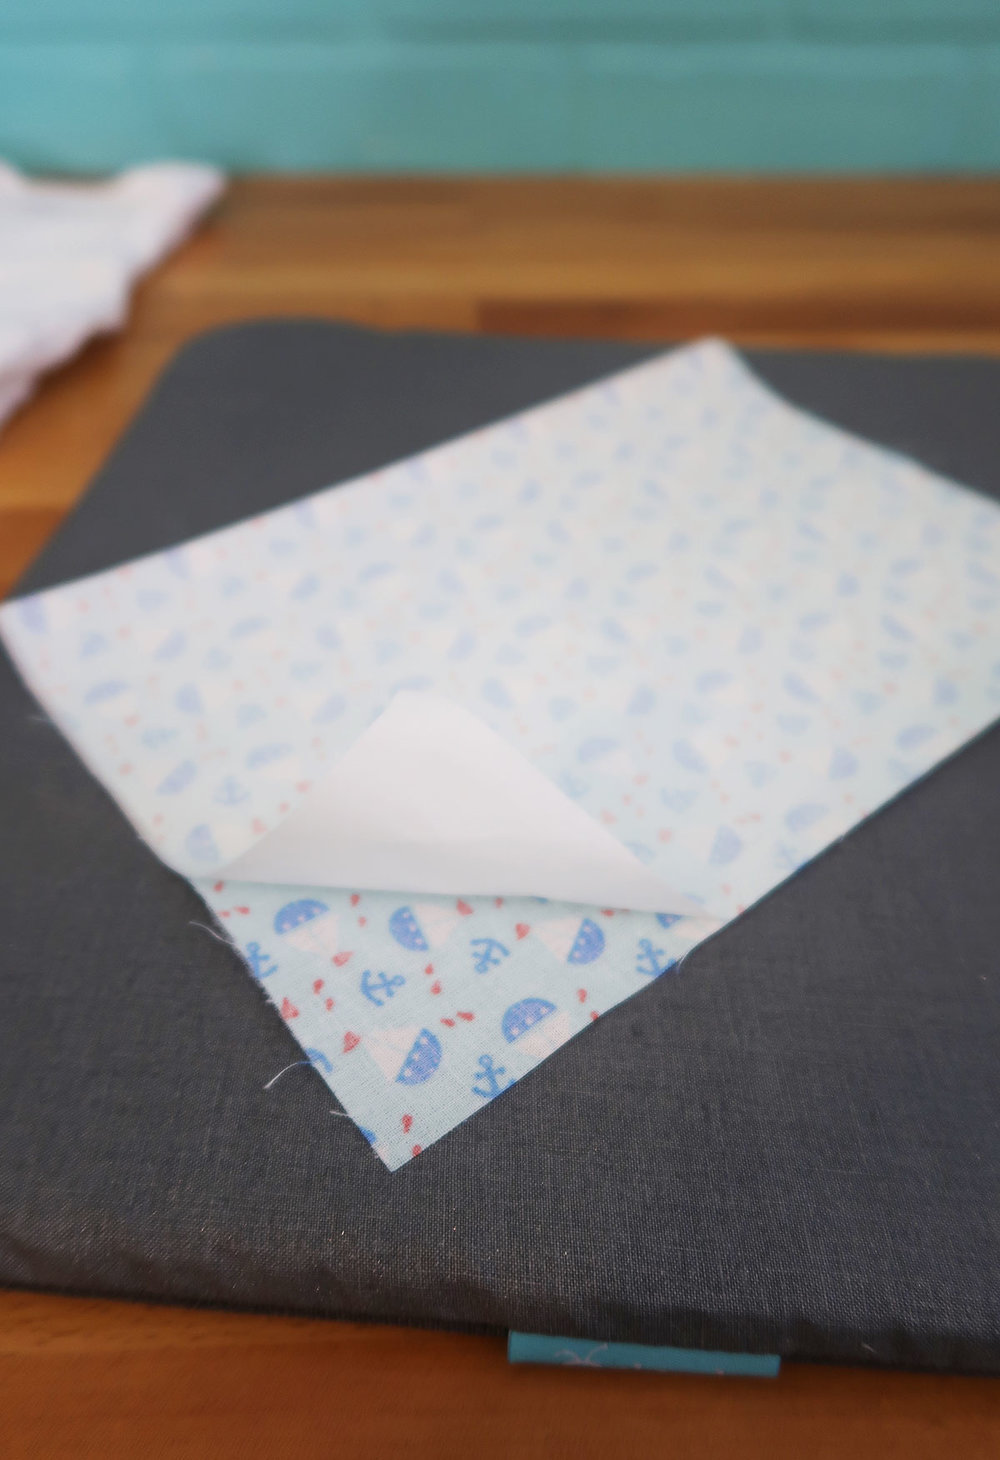
Step 1.
Using cotton fabric, cut the fabric and heat bond to the size of the designs. Placing the textured side down on the fabric. Iron or use the EasyPress to fuse the fabric and heat bond together.

Step 2.
Let cool a few minutes and peel back the paper backing. This will leave a shiny film on the fabric.
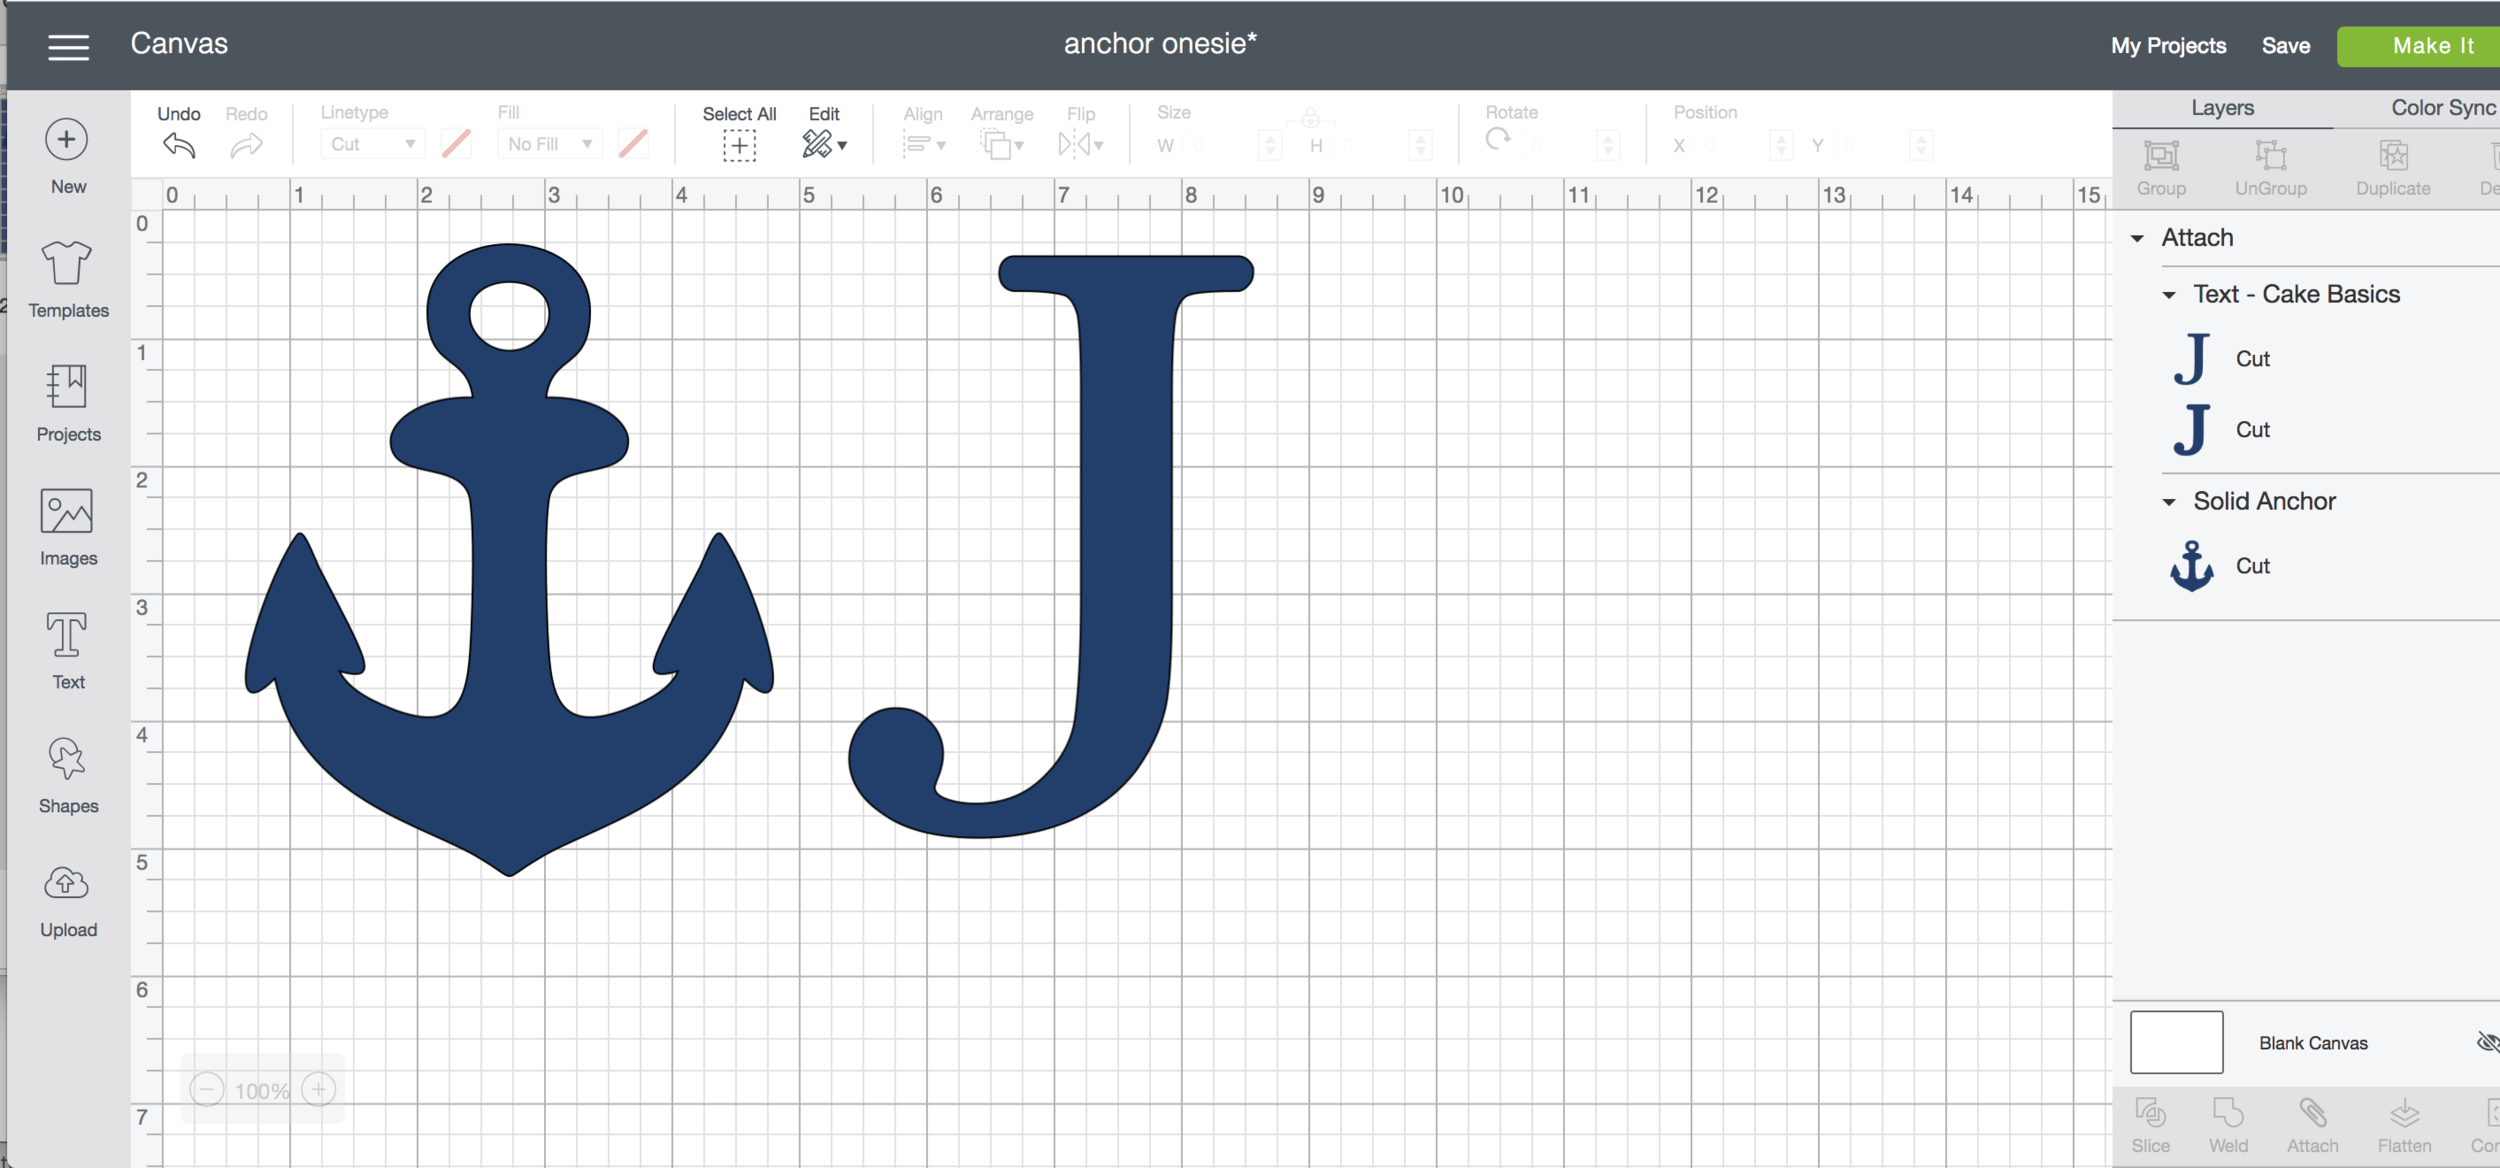
Step 3.
Create or open Cricut Design space files. Size your designs appropriately for the t-shirt or onesie the appliqué is going on. I like to use a ruler or measuring tape to determine the size of the design.
Once sized you are ready to click make it. You DO NOT need to mirror your design. Select that you will be cutting fabric with your rotary blade.
Step 4.
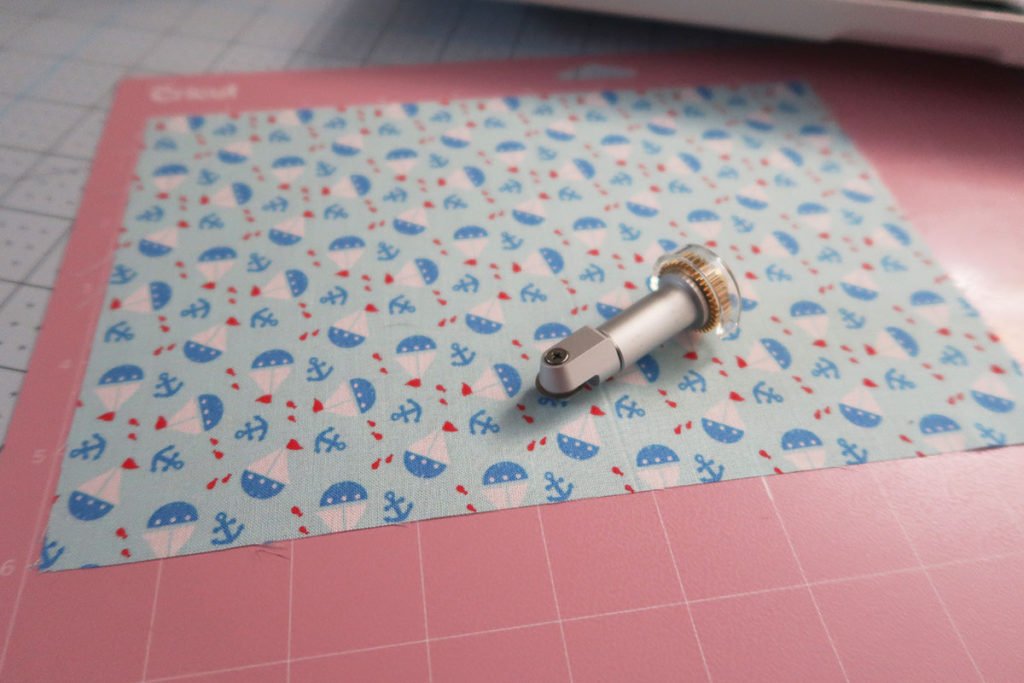
Place your fabric with the fusible side down on the pink fabric mat. Load your rotary blade into your Cricut Maker. Load your mat and press the blinking “C”.
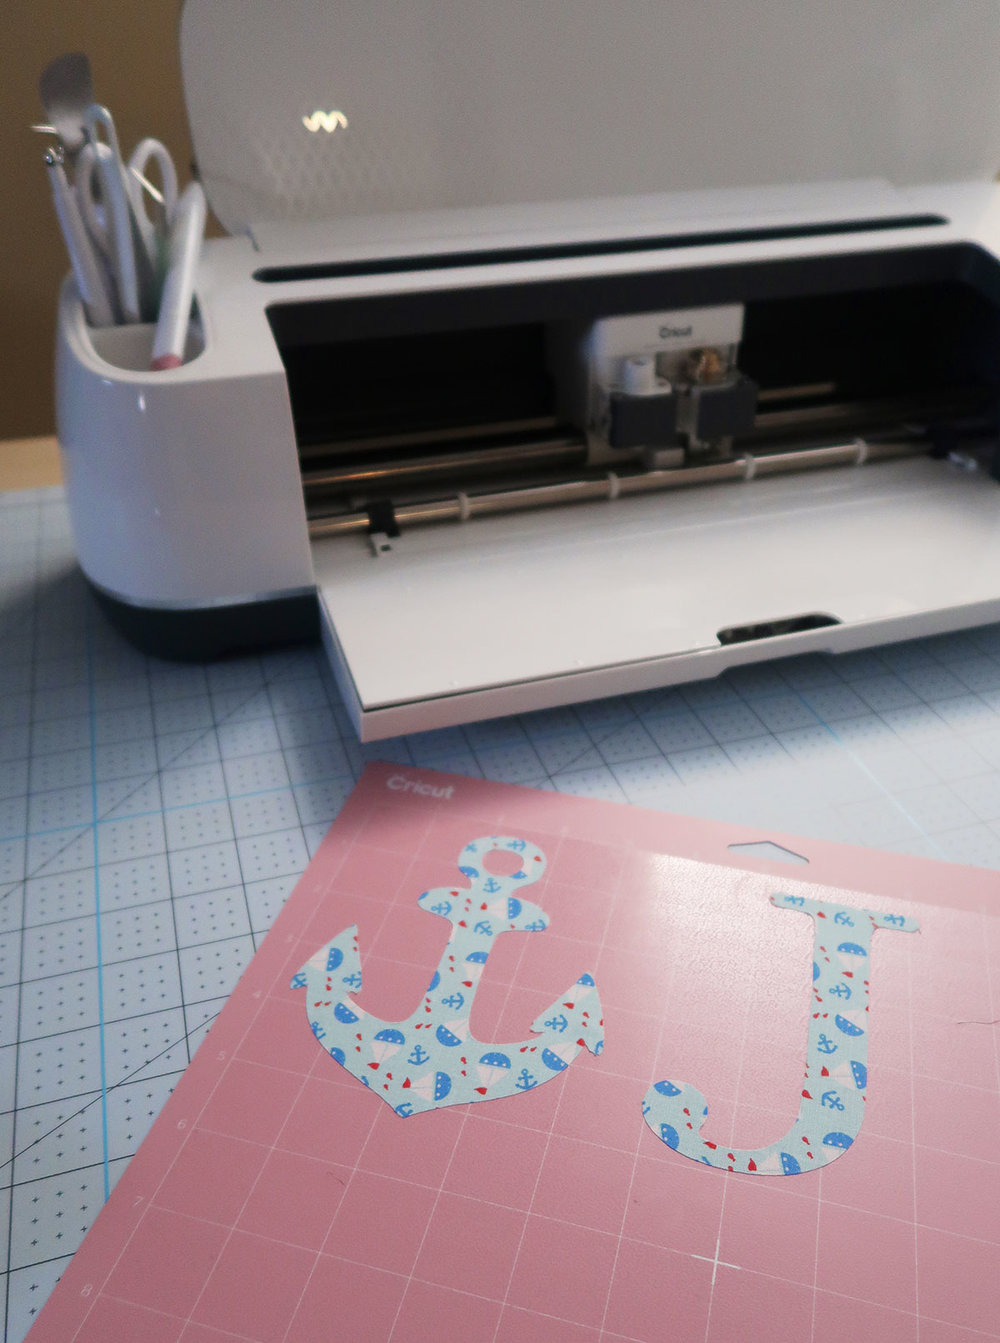
Step 5.
Your Cricut Maker will start to cut your appliqué. Press the blinking arrow to unload your mat when the cutting is done. Weed your excess fabric and you are left with your no sew iron on appliqués.

How to iron on your appliqués.
-
Pre-heat the EasyPress2 to 305 degrees (If you are working with cotton)
-
Pre-heat the material for 15 seconds
-
Place the design on to your onesie
-
Place EasyPress2 on the design for 15 seconds
-
Flip over and press the back for 15 seconds.


I’m new! Lol does the fabric not fray?
I zigzag stitch on my sewing machine around mine bc I’m scared it will. I’ve been seeing some people doing iron on around the edges to prevent fraying…. I might try this and see how it holds up. I like small appliqués and sometimes it can get really tricky sewing around all the small parts.