This post contains affiliate links, please read our disclosure policy.
This is a sponsored conversation written by me on behalf of Cricut . The opinions and text are all mine.
This post contains affiliate links.
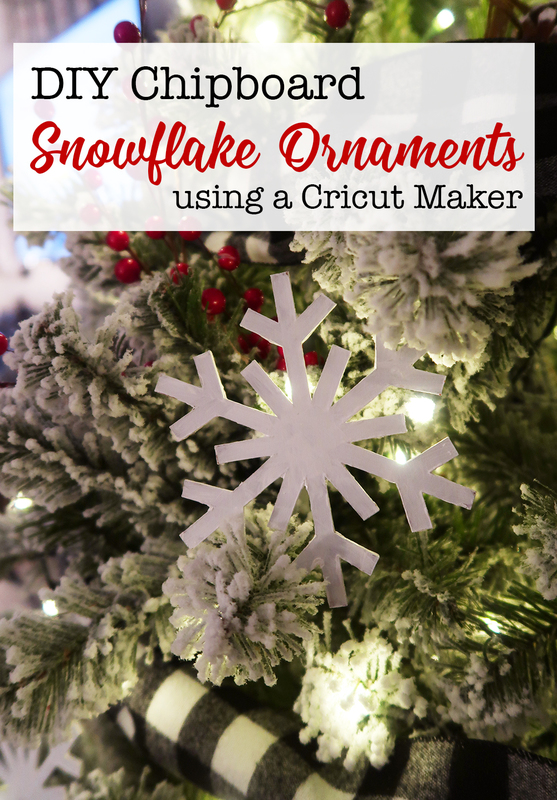
Learn how to cut chipboard on your Cricut Maker. Easily make DIY snowflake ornaments.Learn how to cut chipboard on your Cricut Maker. Easily make DIY snowflake ornaments.
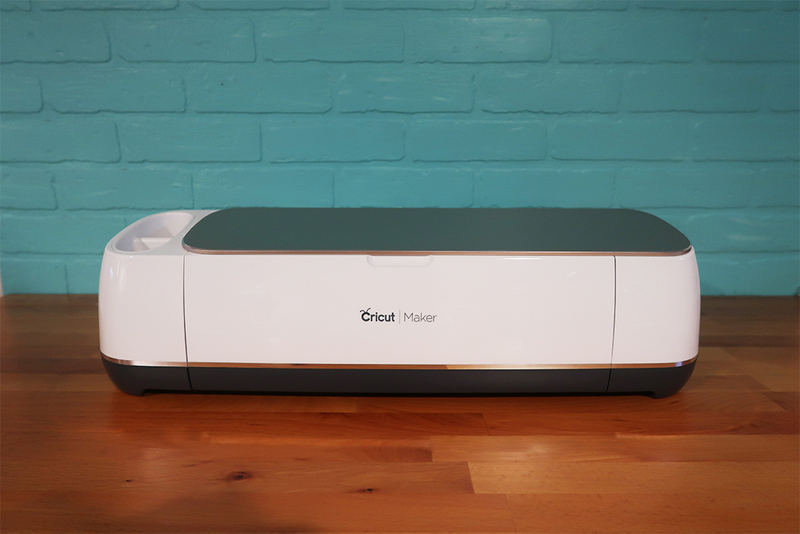
I am excited to show you guys my newest cutting machine the Cricut Maker! Today I am going to be answering some FAQ about the Cricut Maker and also showing you how to use the knife blade to cut chipboard.
Now I have been using my Cricut Explore Air 2 non stop since I got it about 2 years ago. Here are some of my favorite Cricut projects I have made to date.
Cricut Maker FAQs
What makes the Maker different from other Cricut machines?
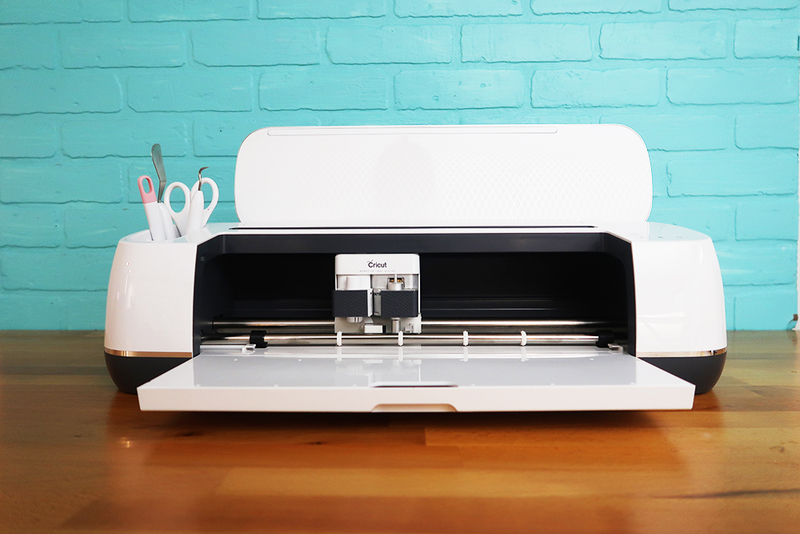
Now I have tried a lot of the cutting machines on the market and what makes it different is its ability to cut thicker materials such as chipboard, leather, balsa wood and some fabric without backing. The extra-deep Knife Blade cuts through dense materials up to 2.4 mm (3/32″) thick. The Cricut Maker can cut out sewing pattern and comes with a larger variety of tools.
What kind of DIY projects can you make?
The creativity is infinite with this machine. Some of my favorite things to make are signs, tshirts, ornaments, scrapbooks, sewing projects, jewelry from leather and stencils.
Can you upload your own images?
Yes the Cricut design space supports SVGs, PNGs, JPGs, GIFs and DXFs.
What materials can the Cricut Maker cut?
- Iron On
- Vinyl
- Leather
- Chipboard
- Fabric
- Cardstock
- Felt
- Balsa Wood
- and more…
Will I use the Cricut Maker enough to justify the price?
For me the answer is yes. Not very often does a weekend go by that I don’t use my Cricut. Just think of how often you get asked to go to a paint night or a sign night or how often you order something custom on etsy. It adds up! Not to mention you could host your own sign night or open your own etsy shop once you master your Maker.
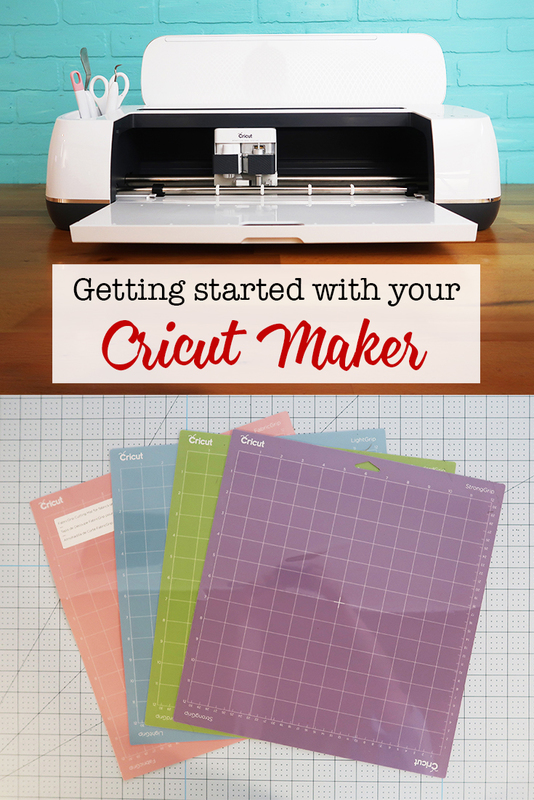
Which Cricut mat should I use?
Now before we get to crafting I want to walk you through your essential mats you will want for your Cricut Maker.
Now if you plan on cutting thick materials you are going to want to make sure that you have the StrongGrip mat (purple). Your StandardGrip mat (green) should be used for vinyl, iron on, cardstock and most of your everyday material. LightGrip Mat (Blue) is used to cut paper, light cardstock and vellum. FabricGrip (pink) is specially designed to secure and cut fabrics with easy release.

Let’s make some DIY chipboard snowflake ornaments.

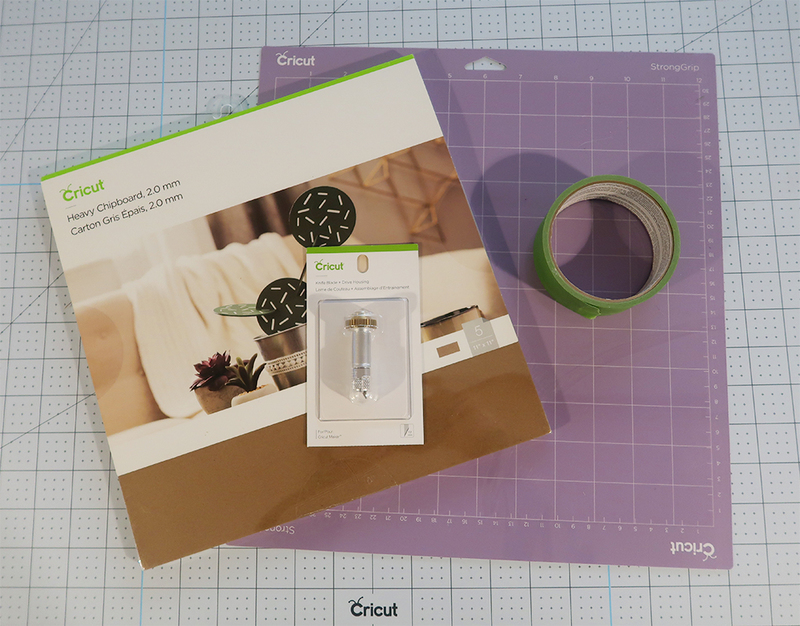
Here’s what you’ll need
- Cricut Maker
- This cut file
- StrongGrip Mat
- Chipboard
- Cricut Knife Blade
- Masking tape
- White paint
- Paint brush
In Cricut design space either use this design file or under images search snowflakes and use a snowflake that will look great with your tree. I use this snowflake and put 4 up on a sheet. Now one thing to note is chipboard is not 12×12 its more like 11×11 so keep that in mind when placing your design on the virtual mat. Now we are ready to make it.

Set material
Click continue and let’s set our material. Click browse all materials and you are going to want to type in chipboard. If you are not seeing it come up and you are on your ipad go onto your computer.
Chipboard takes longer to cut so I suggest plugging your Cricut Maker into your computer that way you don’t lose connection. This can happen with cuts that take over an hour.

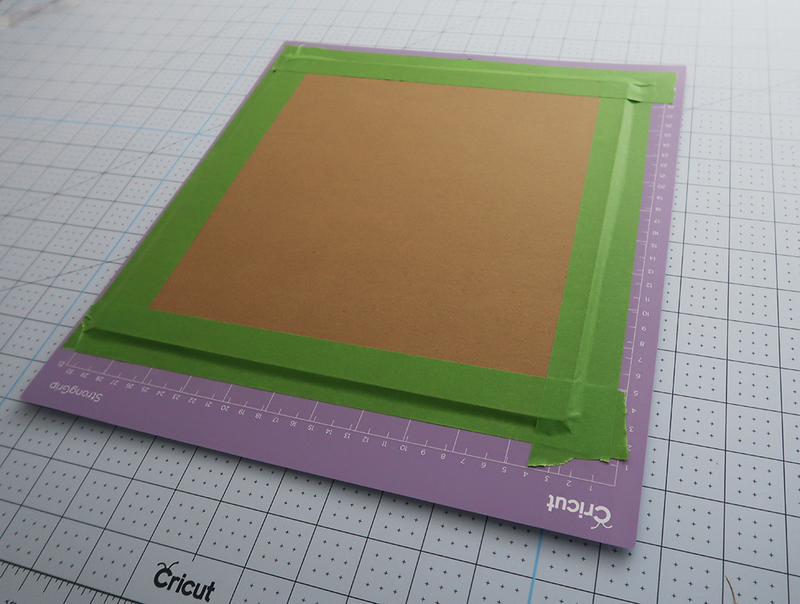
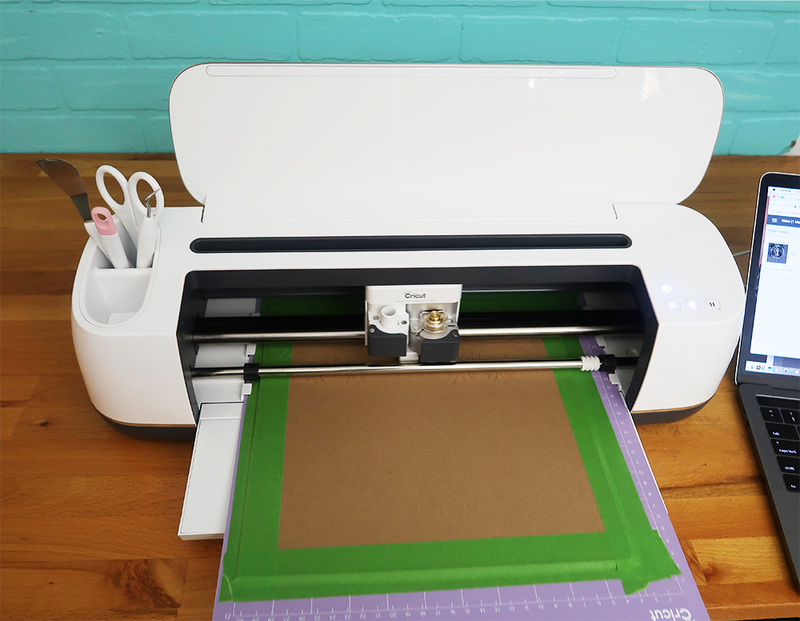
Ok now we are ready to load our mats. Normally we would just put our materials on to the mat and we are ready to go but because we are cutting a thicker material you are going to want to get out some masking tape or painters tape.
Place your chipboard lined up on the right side and tape around securing to the mat.
Important before you cut chipboard
Before you cut chipboard make sure you move over your star wheels on your roller bar. Look at the picture below to see what wheels I mean and where they should be.

Load your knife blade and mat
Before you load your mat you are going to want to load your knife blade. The knife blade cuts extra deep and it allows you to cut chipboard and balsa wood. To load the knife blade remove the plastic cap over the blade and open slot b on your maker. Place the blade in so the flat open part of the gear is against the machine. Now if you haven’t calibrated your knife blade follow these instructions here.
Now you are ready to load your mat. Place your mat within the groves and press your lit up arrow buttons. Once your mat is loaded the Cricut “C” should also be lit up. Press this and your Maker should begin to cut.
Cutting time
Because we are cutting through a thick material the maker makes multiple passes on your design. The more intricate you cut the longer it takes. Also note you don’t want to make your cuts smaller than 3/4″. This cut took 20 passes which was over an hour. So start on another christmas craft or if your like me watch an episode of Fixer Upper and do some laundry.
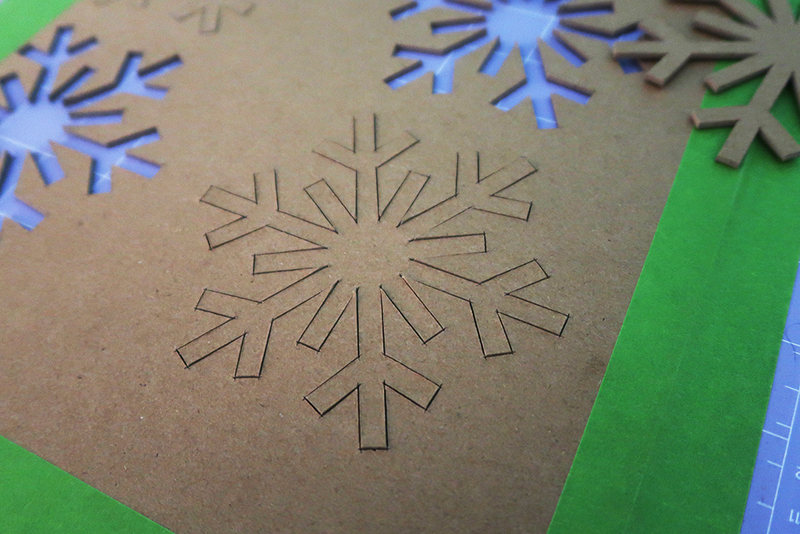
When you are done cutting unload your mat by pressing the arrows again. They should be lit up. I use the spatula tool and lifted up the snowflakes. Guys I am so impressed with the cuts. They are clean and beautiful.

Once you have all your snowflakes loose you are ready to paint. I used multi-surface acrylic paint and a detail brush.
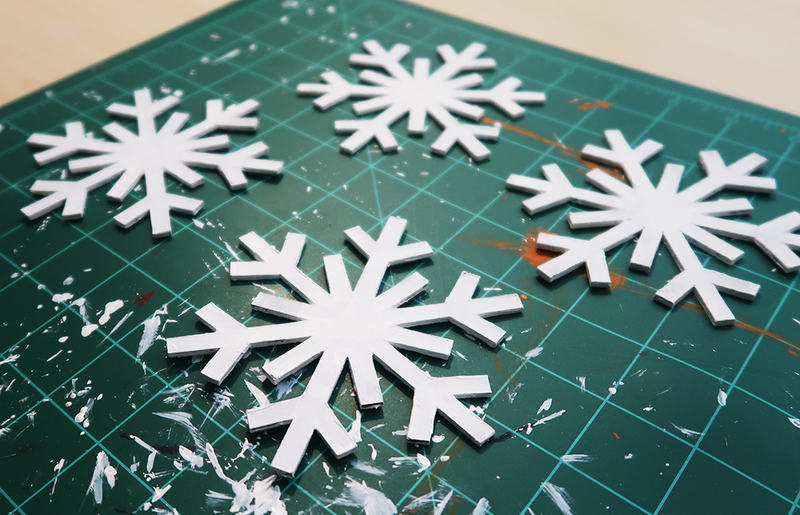
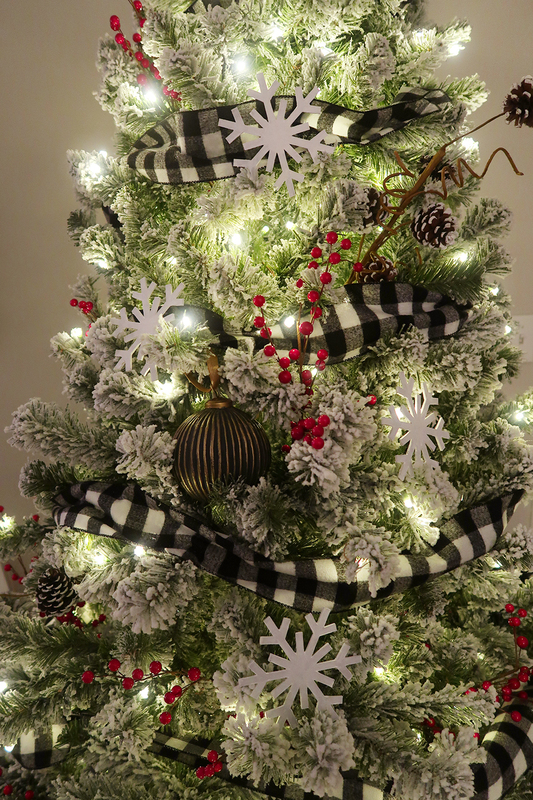
I painted 2 coats on each side letting them dry in between. Now you could use twine and a dab of hot glue for a string but I actually liked the look of resting these on my tree.
You guys are getting the first official sneak peek of my tree! In a few weeks I will be outfitting it with many more Cricut made ornaments. But I think you can possibly tell my theme already 😉
Comments submitted may be displayed on other websites owned by the sponsoring brand.


This is a great overview of the Cricut maker, thanks for your insight. These ornaments are so pretty on your tree!
I love my Maker and love how well it cuts through the heavy chipboard. Your ornaments are beautiful! Pinning!
You’re very convincing . . . I’d love to be able to cut chipboard! These are so pretty.